• Active
  • Blog
  • Cart
  • Checkout
  • Cooking Crew Recipes
  • Cooking Crew!
  • Disclaimer
  • Library
  • Media Kit
  • My account
  • Nutrition and Food Safety Disclaimer
  • Opt Out of 5 Chef Secrets
  • Press
  • Privacy Policy and Copyright
  • Recipe Index
  • Refund and Returns Policy
  • RSS Email Subscription Confirmation
  • Shop
  • Subscribe
  • Ultimate Recipes for Becoming a Rockstar Cook!
  • Welcome to Heather Likes Food!
  • Work With Me
  • About Heather Cheney
  • Contact
menu icon
go to homepage
subscribe
search icon
Homepage link
  • Recipe Index
  • About
  • Contact
  • Shop
    • Facebook
    • Instagram
    • Pinterest
    • YouTube
  • ×
    Home / Recipes

    Rich and Creamy Buttermilk Syrup

    By Heather LAST UPDATED July 17, 2019 · FIRST PUBLISHED July 3, 2018, Leave a Comment

    This buttermilk syrup is one of my all-time favorite breakfast recipes. It makes any ordinary waffle, pancake, or french toast something totally spectacular! Buttermilk syrup in a glass jar

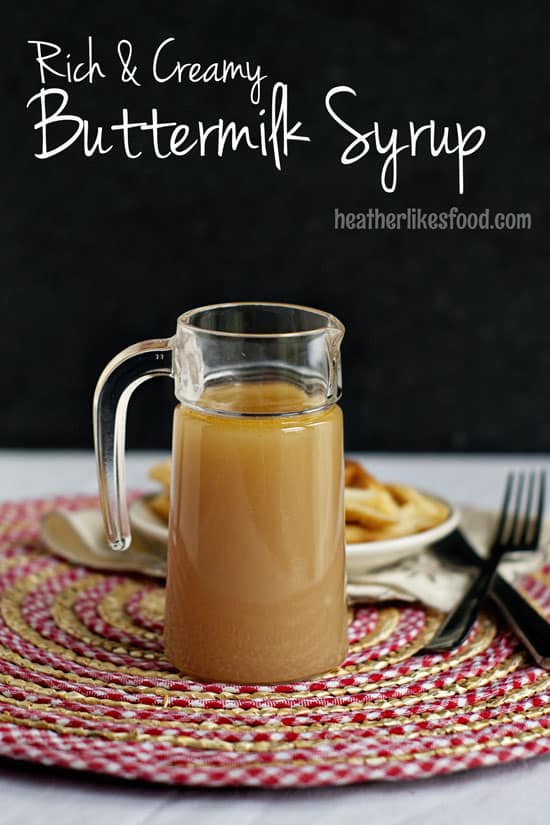
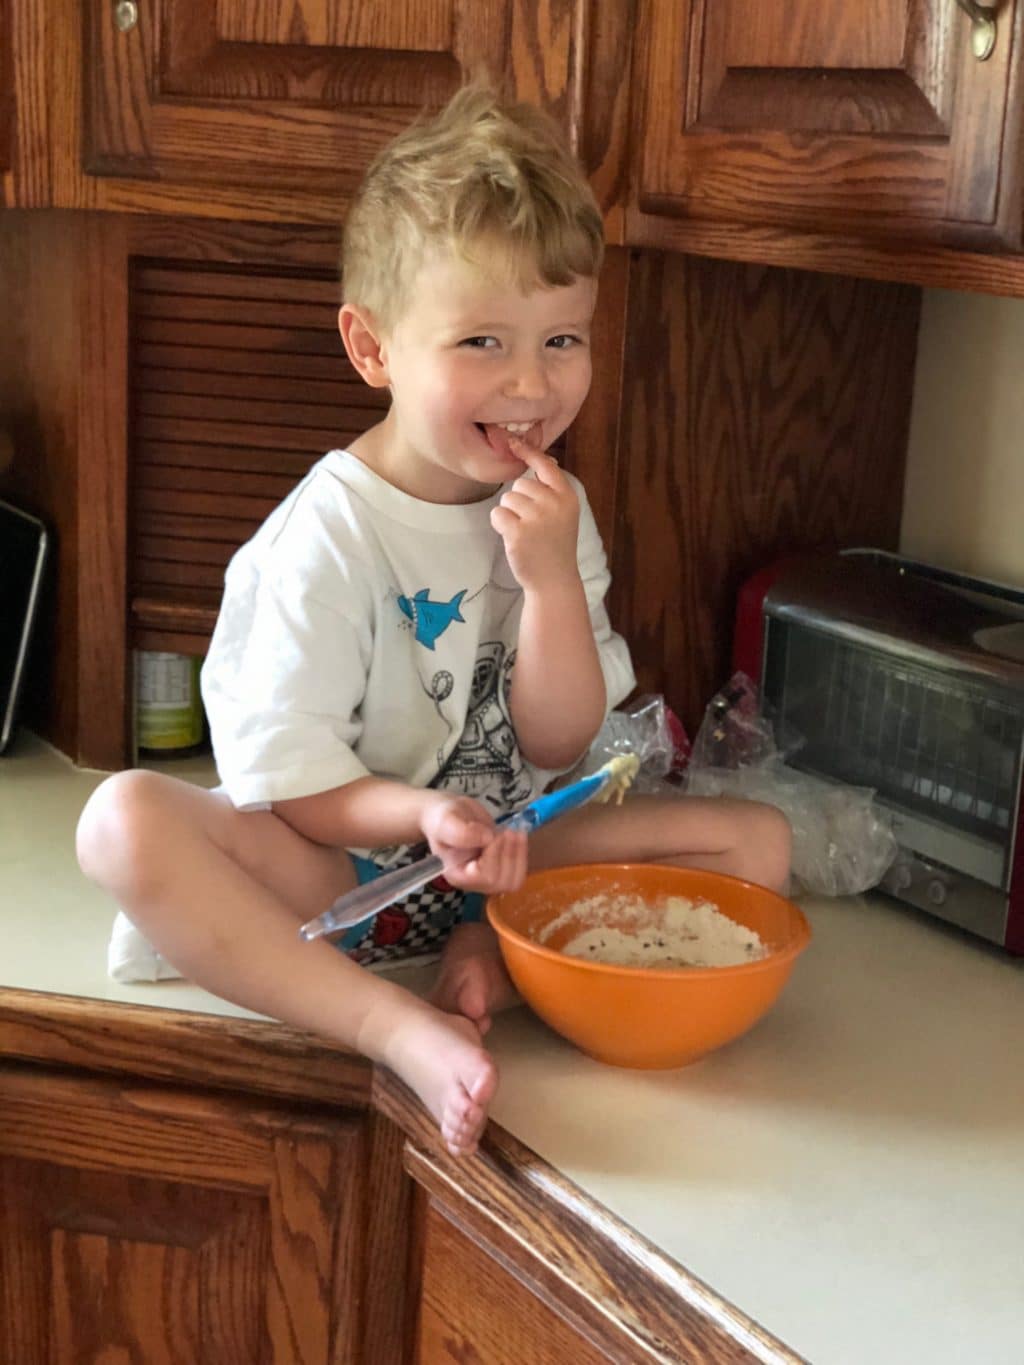
    I'm teaching Em, my almost seven-year-old, how to cook this summer. My initial plan was to start with scrambling eggs, sandwiches, etc and then move our way up from there, thinking she'd be satisfied. But I should have known that wouldn't cut it just by the mere fact that she's my daughter. Silly me. When I asked what kind of things she wanted to learn how to make, her list started off with tamales, bbq ribs, and chicken enchiladas.

    Oy.

    Our kitchen escapades started yesterday with french toast and we sure wish we would have had some buttermilk syrup to go along with it. This syrup only takes a few minutes to make but I'm sure glad I didn't take that time yesterday. As soon as we sat down to eat I realized somebody was coming to buy the very table we were eating off of in 5 minutes!  I quickly shuffled the kids to the coffee table and was found wiping down the top right as the doorbell rang.

    What is Buttermilk Syrup?

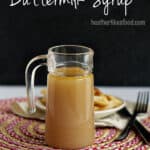
    Buttermilk syrup is a breakfast syrup made from butter, sugar, buttermilk, baking soda and vanilla. It is similar to a caramel sauce but has a distinct flavor that comes from the reaction between the baking soda and buttermilk. This reaction also makes the syrup creamy and smooth. It's best served on waffles, pancakes, or french toast.

    How Long Does Buttermilk Syrup Last In the Fridge?

    Once made, buttermilk syrup will stay good for up to two weeks in the fridge when stored in an air-tight container.

    What is Buttermilk?

    Traditionally, buttermilk is the tangy liquid left behind when making butter from cream. This liquid would be fermented and would naturally turn into a thick and tangy cream. It's full of protien and low in fat making it a healthy option. But these days, buttermilk is typically made by adding bacteria to low fat milk making something very similar to the original with out all the extra work.

    Can I Make Buttermilk from Regular Milk?

    Yes! Faux-buttermilk can be made by combining 1 cup of milk with 1 tablespoon of acid. Lemon juice or vinegar work best for this. Mix the two together and allow to sit for a few minutes before using. The resulting mixture will look chunky and thick, but is fine and will work just like store-bought buttermilk!

    Buttermilk syrup being poured on top of waffles

    How to Make Buttermilk Syrup:

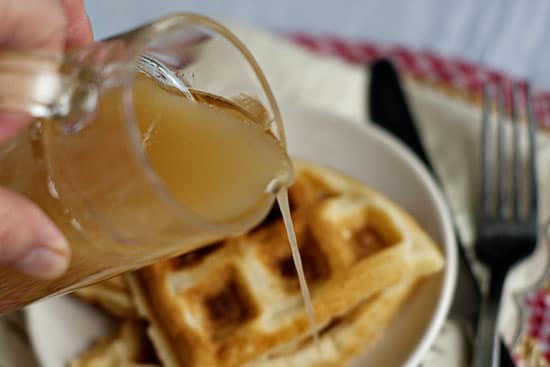
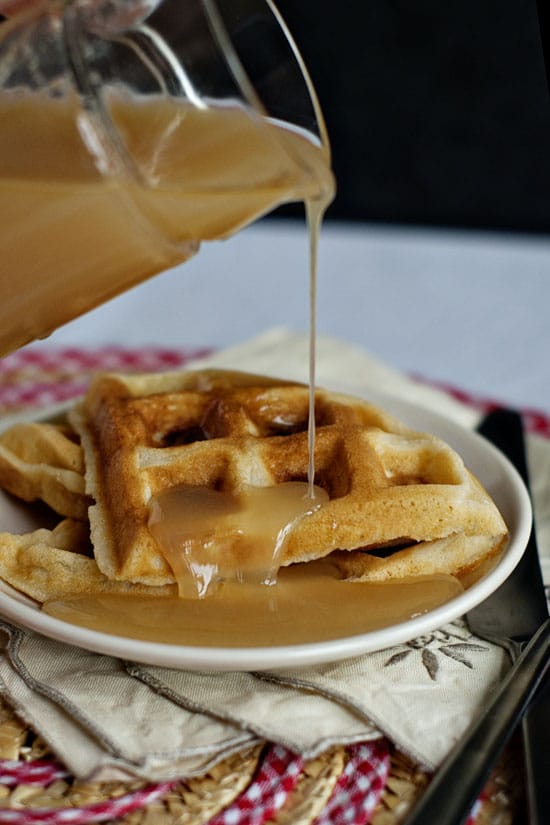
    Just like its name, buttermilk syrup is creamy, buttery and just about makes anything you put it on taste like a big, sweet miracle. The best part is that it only takes about 5 minutes to make.

    1. Combine the butter, sugar and buttermilk in a pot much bigger than you think you'll need.
    2. Bring mixture to a boil and cook for 1 minute.
    3. Whisk the baking soda and vinegar into the pan, stirring constantly until it stops foaming.
    4. Be careful! The addition of baking soda at the end thickens and flavors it but it also causes your molten butter and sugar to erupt and foam like a bad science experiment gone awry if your pan is too small.

    Buttermilk syrup being poured on a stack of waffles

    This syrup is great on all things that you would use maple syrup on. But my absolute favorite recipe to serve this with is my Blueberry Muffin French Toast Souffle. If you try it, let me know!

    📖 Recipe

    Creamy Buttermilk syrup in a glass jar.
    Print Recipe
    4.84 from 6 votes

    Rich and Creamy Buttermilk Syrup

    This creamy buttermilk syrup is what your breakfast dreams are made of. Make it once and never go back to maple syrup again!
    Cook Time5 minutes mins
    Total Time5 minutes mins
    Course: Breakfast
    Cuisine: American
    Keyword: Buttermilk Syrup
    Servings: 12 servings
    Calories: 211kcal
    Author: Heather Cheney

    Ingredients

    • ½ cup butter
    • 1 cup buttermilk
    • 2 cups sugar
    • 1 teaspoon baking soda
    • 2 teaspoons vanilla

    Instructions

    • Using a pot much bigger than what you think you'll need...
    • Combine buttermilk, sugar and butter and bring to a boil. Boil for 1 minute and remove from heat.
    • Stir in baking soda and vanilla , stirring constantly until it stops foaming up (this is where it could potentially make a mess).
    • Serve over pancakes, waffles, etc while still warm. Store in an airtight container for up to 2 weeks in the fridge. 

    Nutrition

    Serving: 1serving | Calories: 211kcal | Carbohydrates: 34g | Fat: 8g | Saturated Fat: 5g | Cholesterol: 22mg | Sodium: 180mg | Potassium: 27mg | Sugar: 34g | Vitamin A: 270IU | Calcium: 25mg

    Coconut Lime Cream Cheese Fruit Dip

    By Heather LAST UPDATED July 8, 2020 · FIRST PUBLISHED June 18, 2018, 1 Comment

    This cream cheese fruit dip will have everyone coming back for seconds! It's cool and creamy with big flavor and is perfect for dunking fresh cut fruit in for a delicious summer treat. Easy Coconut Lime Cream Cheese Fruit Dip

    Happy Monday, friends! It's summer and I'm pretty sure I could keep myself sustained by eating watermelon and kettle corn for the next three months. I may have to throw some copycat Chipotle Guacamole in here and there, but for the most part, watermelon is my BBF right now... especially when I take the time to make this coconut lime cream cheese fruit dip recipe.

    Coconut Lime Cream Cheese Fruit Dip

    I know, cream cheese fruit dip isn't exactly a new idea, but this recipe takes the classic fruit dip to a whole new level. The key ingredient here is Cream of Coconut and it gives the dip a rich coconut flavor and sweetness that is incredible with all kinds of fruits.

    What is Cream of Coconut?

    Cream of Coconut is basically coconut's version of Sweetened Condensed Milk. It's concentrated coconut milk mixed with a high volume of sugar and is typically used for making mixed drinks and ice cream where you need lots of sweetness and coconut flavor-- which makes it great for this fruit dip!

    Coconut Lime Fruit Dip with Cool Whip

    Cooking Tips for Making the Best Fruit Dip

    • For the creamiest fruit dip with no lumps of cream cheese, make sure your cream cheese is very soft and not cold at all.  Add the cream of coconut slowly, mixing and scraping the bowl between each addition to make sure all the cream cheese is combined well with the other ingredients before adding more.
    • Fold the whipped topping into the final dip gently so it stays as fluffy as possible.

    Can Fruit Dip be made Ahead?

    Yes! Make this dip up to a few days before you're ready to serve.

    How Long Does Fruit Dip Last?

    Not long enough in my fridge! You can expect it to last about one week in the fridge stored in an airtime container.

    Is Fruit Dip Healthy?

    Well, it's made with cream cheese, marshmallow cream, sweetened condensed coconut milk and cool whip, so you be the judge. Is it beneficial to your mental well-being? YES!

    What Fruit Should I Dip in Fruit Dip?

    I'm not gonna lie, I would (and have) eaten this dip with a spoon. But, if you're looking for some fruit recommendations, here are my favorites that are sturdy and can withstand some serious dipping.

    • Watermelon
    • Cantaloupe
    • Honeydew Melon
    • Pineapple
    • Strawberries
    • Apples
    • Grapes

    The Best Fruit Dip Recipe

    Other Delicious Fruit Dessert Recipes

    • Delicious Strawberries and Sour Cream
    • Raspberry Oreo Fluff
    • Ultimate Ambrosia Fruit Salad

    📖 Recipe

    Print Recipe
    4.80 from 10 votes

    Coconut Lime Cream Cheese Fruit Dip

    This cream cheese fruit dip will have everyone coming back for seconds! It's cool and creamy with big flavor and is perfect for dunking cut fruit in for a fresh summer treat. 
    Prep Time10 minutes mins
    Cook Time0 minutes mins
    Chilling Time1 hour hr
    Total Time1 hour hr 10 minutes mins
    Course: Snack
    Cuisine: American
    Keyword: Cream Cheese Fruit Dip
    Servings: 12 servings
    Calories: 311kcal
    Author: Heather Cheney

    Ingredients

    • 8 ounces cream cheese softened to room temperature
    • 15 ounces cream of coconut --NOT coconut milk-- This is found in the drink mixer aisle.
    • 2 tablespoons fresh lime juice more to taste
    • 7 ounces marshmallow cream
    • 8 ounces whipped topping Cool Whip or Similar

    Instructions

    • Mix cream cheese in a medium-sized bowl with an electric mixer until very soft and smooth. Slowly mix cream of coconut into the cream cheese, beating until smooth, followed by the lime juice.
    • Mix marshmallow cream into the mixture until smooth. Using a spatula, fold whipped topping into the dip until fully combined.
    • Refrigerate dip for at least 1 hour before serving to allow it to thicken. Garnish with shredded coconut and lime wedges if desired.

    Nutrition

    Serving: 1serving | Calories: 311kcal | Carbohydrates: 44g | Protein: 1g | Fat: 14g | Saturated Fat: 11g | Cholesterol: 21mg | Sodium: 92mg | Potassium: 45mg | Fiber: 1g | Sugar: 38g | Vitamin A: 270IU | Vitamin C: 0.7mg | Calcium: 32mg | Iron: 0.1mg

    The Indulgent Life

    We're officially three weeks into school being out for the summer! In that time...

    This guy decided to go out for a toddler Village People cover band upon hitting the ripe age of 4. We celebrated with lots of cake and a talk about how your clothing choices affect how others perceive you. He took it well, I think.

    I managed to make ridiculously-sized cinnamon rolls for a daddy-daughter breakfast this last weekend. You know they are too big when full-grown men can't finish one. This is it what they looked like before they had their second rise and bake, so use your imagination.

    My girls gave me a "spa" day and took, what might be, the most disturbing picture of me ever. I use the term "spa" loosely as it mostly consisted of them laughing as they peeled the mask off my face and watched me squirm in pain.

    Hope you're enjoying your summer!

    Pineapple Coconut Macaroon Cookie Bars

    By Heather LAST UPDATED July 17, 2019 · FIRST PUBLISHED May 31, 2018, Leave a Comment

    These Pineapple Coconut Macaroon Cookie Bars are sweet, coconutty, chewy and are made pretty darn quickly thanks to a  tricky secret ingredient that you won't even know is there! Coconut Macaroon Cookie Bars on a white plate

    You guys, did you know it's National Macaroon Day?!

    What?!? You don't keep up on obscure food holidays? Hmm, well I'm sharing these Macaroon Cookie Bars in honor of today's not-so-momentous occasion anyway, and I hope you'll indulge me for a bit.

    What are Macaroons, Anyway?

    Traditional macaroon cookies are made with whipped egg whites, copious amounts of sugar to form a sort of meringue and large flaked coconut. The baked cookies are soft and chewy, sometimes dipped or drizzled in chocolate and a coconut lovers dream.

    Coconut Macaroons vs. Macarons- which is which?

    Not to be confused with Coconut Macaroons, Macarons are a French sandwich cookie made with an almond flour meringue and a creamy filling. Why they need to have such similar names is a mystery to me.

    Sliced Coconut Macaroon Cookie Bars on a white plate

    How to Make Coconut Macaroon Cookie Bars

    This recipe is a worthy substitution to traditional macaroon cookies when you don't want to pull out the mixer and need macaroons STAT!

    The thing that makes these macaroon cookie bars so easy to make is a top-secret ingredient-- Pillsbury Crescent Rolls. The crescent roll dough bakes between two layers of sweetened condensed milk, pineapple preserves and flaked coconut, giving the bars structure and rich buttery flavor.

    I'd dare to say that you wouldn't even know what the middle layer is made out of it you didn't already know. It just blends into the cookie bar so well that it becomes part of the dessert.

    Coconut Macaroon Cookie with chocolate drizzle

    Tips for Making Coconut Macaroon Cookie Bars

    • Grease your 9"x13" pan very well with cooking spray or butter. Sweetened condensed milk is high in sugar and will stick BADLY to your pan if you do not grease it well.
    • If you can't find plain pineapple preserves, apricot pineapple preserve is easy to find and works well in this recipe as well.
    • Coconut browns quickly the last few minutes of baking so watch them closely for the last 5 minutes and remove when it's toasted to your liking.
    • To make your Macaroon bars look a little prettier, melt ½ cup of semi-sweet chocolate chips in the microwave, stirring every 5 seconds until smooth. Stir in 1 teaspoon of vegetable shortening into the chocolate to thin it a little bit and drizzle over the tops of the bars before cutting.

    Tools Needed For Making Coconut Macaroon Cookie Bars

    • 9"x13" pan--  I prefer to use glass as I feel they bake more evenly and the treats come out more easily.
    • Mini Server Spatula-- I use my mini spatula all the time. It's perfect for serving up treats made in a rectangular pan like this recipe.

    📖 Recipe

    Print Recipe
    5 from 3 votes

    Pineapple Coconut Macaroon Cookie Bars

    Chewy, sweet, and buttery, these coconut macaroon cookie bars are easy to put together and no one will ever guess what the secret ingredient is!
    Prep Time10 minutes mins
    Cook Time35 minutes mins
    Total Time45 minutes mins
    Course: Dessert
    Cuisine: American
    Keyword: Macaroon Cookie
    Servings: 24 servings
    Calories: 181kcal
    Author: Heather Cheney

    Ingredients

    • 3 ½ cups sweetened, flaked coconut divided
    • 1 can sweetened condensed milk 14 ounces
    • 1 cup pineapple preserves
    • 1 tube refrigerated Crescent Rolls 8 ounces
    • chocolate for drizzling

    Instructions

    • Preheat oven to 350 degrees.
    • Sprinkle 1 ½ Cups coconut into a well-greased 9"x13" baking pan. 
    • Combine milk and pineapple preserves; drizzle ½ of the mixture over the coconut. 
    • Unroll crescent dough into the pan over the milk and coconut.
    • Drizzle remaining milk mixture over the crescent dough and top with remaining coconut. 
    • Bake for 30-35 minutes or until golden brown, watching closely the last 5 minutes. Remove from oven and cool completely.
    • Drizzle melted chocolate over the tops of the bars, cut and serve. Store remaining bars in the fridge. 

    Nutrition

    Serving: 1serving | Calories: 181kcal | Carbohydrates: 28g | Protein: 2g | Fat: 6g | Saturated Fat: 5g | Cholesterol: 5mg | Sodium: 134mg | Potassium: 116mg | Fiber: 1g | Sugar: 21g | Vitamin A: 45IU | Vitamin C: 1.7mg | Calcium: 51mg | Iron: 0.4mg

    National Macaroon Day!

    Since it's National Macaroon Day, I've got 15 other decadent macaroon recipes here for you from some of my blogging friends and others that just looked delicious! Hope you enjoy!

    Chocolate Coconut Macaroon Tart-- Ashlee Marie

    Macaroon Kiss Cookies-- Creations By Kara

    Chocolate Coconut Macaroons-- Pretty Providence

    Almond Coconut Macaroons-- Savory Experiments

    Easy Coconut Macaroons-- Real Mom Kitchen

    Gluten-Free Macaroons-- Namely Marley

    Lemon Coconut Macaroon Cookies-- Simply Stacie

    Pumpkin Spice Coconut Macaroon Cookies-- Crunchy Creamy Sweet

    Cherry Coconut Macaroons-- Cookie Dough and Oven Mitt

    Chocolate Covered Raspberry Coconut Macaroons-- Old House to New Home

    Double Chocolate Coconut Macaroons-- Lemon Tree Dwelling

    3 Ingredient Coconut Macaroons-- My Montana Kitchen

    7 Layer Bar Coconut Macaroons-- Layers of Happiness

    No-Bake Salted Caramel Coconut Macaroons-- Life Love and Sugar

    15 coconut macaroon recipes

    Easy Pizza Sticks

    By Heather LAST UPDATED June 25, 2020 · FIRST PUBLISHED May 21, 2018, Leave a Comment

    These Easy Pizza Sticks are filled with mozzarella cheese and wrapped in tender dough. They have all the flavor of pizza without all the work and come together in just a few minutes. Perfect for kicking that pizza craving straight to the curb! 

    Easy Pizza Sticks recipe

    I've been craving pizza something awful these past few days, and I'm not feeling motivated enough to make my homemade pizzeria style deep dish pizza, my Pizza Dip even my chicken bacon garlic bread pizza, so I thought I'd pull these easy pizza sticks out from my photo archives and share them with you today. If you're in the mood for carby-cheesy goodness without all the work, these babies are for you!

    They are super simple and you can be noshing on them in about 20 minutes if you get to work right now!

    How to Make Pizza Sticks

    We're using premade crescent roll dough to keep things simple and let's face it, delicious. Maybe I'm crazy, but I love myself some tube dough.<--- that sounds less appetizing than I mean for it to be.

    It may not be the most nutritious bread in all the land, but it's so flaky and buttery and is perfect for these pizza sticks!

    Step 1). Unroll the crescent roll dough and separate into sections of two triangles each. Separate the dough into rectangles and pinch the seams together.

    Easy Pizza Sticks-- crescent rolls on baking sheet

    Step 2.) Once the seams are pinched together, line up some pepperoni and place a whole piece of string cheese on top. You can put whatever your favorite pizza toppings are inside these stuffed pizza sticks, so be creative!

    Easy Pizza Sticks stuffed with mozzarella and pepperoni

    Step 3.) Fold the dough over the cheese and then fold the ends up and lightly press down to seal.

    Stuffed Pizza Sticks

    Step 4.) Brush each stuffed pizza stick with olive oil and give them a little sprinkle of garlic salt and Italian seasoning and/or parmesan cheese. Doing this makes them look much more gourmet and impressive.

    Easy Pizza Sticks stuffed with cheese and toppings

    Step 5.) Bake unit they are nice and golden brown and tear into one as soon as you can! There's something about molten cheese that gets me every. single. time.

    Sigh.

    Step 6.) These pizza sticks are great just on their own, but after a quick dunk in a little marinara sauce, they turn into a definite pizza craving stopper. Enjoy!

    Pizza Sticks stuffed with Cheese and Pepperoni

    Can you Freeze Stuffed Pizza Sticks to Bake Later?

    Yes! Not everyone wants to take the time to prepare these when that pizza craving hits! So, to get ahead of the game, prepare the pizza sticks like you were going to bake them and instead of placing in the oven, place the baking sheet in the freezer. Freeze until the pizza sticks are completely frozen and then transfer into a freezer bag. When you're ready to eat some, take the pizza sticks out of the freezer and place on a baking sheet. Allow pizza sticks to thaw for about 15 minutes and then bake as directed in the recipe. Cooking time may be longer.

    Tools I recommend for Making Pizza Sticks

    Baking Sheets-- I love these baking sheets because they are sturdy and last FOREVER! I'm seriously still using the same ones I got for my wedding, 14 years ago. 🙂

    Pastry Brush-- You'll need something to brush the olive oil onto the pizza sticks, and these silicone pastry brushes are my favorite. They are so easy to clean and last forever, too.

    📖 Recipe

    Easy Pizza Sticks | heatherlikesfood.com
    Print Recipe
    4.60 from 5 votes

    Easy Pizza Sticks

     These pizza sticks are one of the quickest and easiest things to make and my kids go crazy for them!
    Prep Time10 minutes mins
    Cook Time12 minutes mins
    Total Time22 minutes mins
    Course: Snack
    Cuisine: Italian
    Keyword: Pizza Sticks
    Servings: 8 pizza sticks
    Calories: 189kcal
    Author: Heather Cheney

    Ingredients

    • 2 tubes Crescent Roll dough 8 count
    • 8 mozzarella string cheese
    • 40-50 slices pepperoni
    • ¼ cup butter melted
    • 3 tablespoons parmesan cheese finely grated
    • 1 tablespoon fresh parsley or 1 teaspoon dried parsley chopped
    • 1 clove garlic minced

    Instructions

    • Preheat oven to 375 degrees
    • Roll dough out and separate into rectangles with 2 triangles in each. Pinch the seam together.
    • Line each rectangle with 5 or 6 slices of pepperoni and top with a string cheese.
    • Fold the dough over the contents and fold the sides up and over to seal.
    • Place sticks on a lined baking sheet.
    • Combine butter, garlic, parsley, and parmesan cheese and brush over the tops of each stick.
    • Bake for 10-12 minutes or until golden brown on both the top and bottom. Remove from oven and serve hot with marinara sauce for dipping.

    Nutrition

    Serving: 1pizza stick | Calories: 189kcal | Carbohydrates: 1g | Protein: 9g | Fat: 16g | Saturated Fat: 8g | Cholesterol: 42mg | Sodium: 479mg | Potassium: 27mg | Vitamin A: 235IU | Vitamin C: 0.7mg | Calcium: 46mg | Iron: 0.2mg

    The Indulgent Life

    I'm enjoying the last few quiet days of the school year with this cute boy before his sisters are home for the summer. I can't believe he only has one more school year before he'll be going to school himself! Ack! He's getting too big, too quick! He love's cooking with me and we had fun one-morning last week making up a small batch of chocolate chip muffins while still in our pajamas. If only I could pause time and let him stay like this (minus the temper tantrums) forever. 🙂

    Ultimate Ambrosia Fruit Salad

    By Heather LAST UPDATED July 17, 2019 · FIRST PUBLISHED May 17, 2018, Leave a Comment

    Cool, creamy, sweet, and tangy this Ambrosia Fruit Salad recipe is the perfect dessert salad for your summer potlucks! Better yet, just keep a bowl of it stashed away in your fridge for when you're craving something sweet! I won't judge.Bowl of Ambrosia Fruit Salad on blue plate.

    I've always been a sucker for desserts I can call salads. It feels a little bit naughty to call this Ambrosia salad an actual salad, but once you're eating it, it just feels so right, ya know? It's kinda like trashy TV where right and wrong get convoluted.

    "Who do I root for?!"

    "Do I still like her/he/them?"

    Oh, conflict. You're fun! But, really...

    Is Ambrosia Salad a Dessert?

    I'm going go ahead and say YES! I mean, is there any other food out there made with marshmallows that isn't a dessert? I'm thinking not. Come to think of it, I've called both of these Raspberry Oreo Fluff, and Cranberry Fluff recipes salads as well. Hmmm.

    What is Ambrosia Salad?

    This ambrosia fruit salad is a vintage recipe, and I'm pretty sure you've eaten some version of it in your lifetime. It's a pretty simple recipe that includes crushed pineapple, mandarin oranges, cool whip and shredded coconut. But I think my version is the "ULTIMATE" (!) because I stir sour cream, vanilla and lemon juice in with the cool whip! This adds a little extra creaminess, flavor, and brightness that most recipes don't have.

    Close up of Ambrosia salad-- marshmallows, cool whip, sour cream, mandarin oranges.

    Tips For Making Ambrosia Fruit Salad

    • Drain your mandarin oranges and crushed pineapple very well. I typically place them both in a colander first thing and let them drain off their juices into a bowl until I’m ready to stir them in.  Getting as much juice drained off as you can will ensure a nice, fluffy salad that isn’t bogged down with extra juice. I love using these strainers for draining things like canned fruit.
    • Use full-fat Cool Whip and Sour Cream for best texture and creaminess. Low-fat and non-fat products contain stabilizers that don't always play well with highly acidic foods like pineapple and oranges.
    • Mix the salad very gently. Mandarin oranges are particularly fragile, and while still tasty, the salad won’t look as pretty if the oranges are broken up into segments

    Can Ambrosia Salad Be Made Ahead?

    Yes! This is one of my favorite things about this type of fruit salad! It keeps very well in the fridge, unlike other fruit salads that brown or turn mushy after a day. For best results, follow the guidelines outlined above about draining, mixing, and using the right ingredients.

    Other Delicious Fruit Dessert Recipes

    • Delicious Strawberries and Sour Cream
    • Coconut Lime Cream Cheese Fruit Dip
    • Raspberry Oreo Fluff

    📖 Recipe

    Print Recipe
    4.55 from 11 votes

    Ultimate Ambrosia Fruit Salad

    Cool, creamy, and sweet, this Ambrosia Salad is perfect for summer potlucks or just for snacking on when you need something sweet and fruity!
    Prep Time10 minutes mins
    Cook Time10 minutes mins
    Total Time20 minutes mins
    Course: Salad
    Cuisine: American
    Keyword: Ambrosia Salad
    Servings: 12 servings
    Calories: 186kcal
    Author: Heather Cheney

    Ingredients

    • 8 ounces full-fat cool whip
    • ½ cup full-fat sour cream
    • 1 tablespoon vanilla extract
    • 1 tablespoon lemon juice
    • 20 ounces crushed pineapple well drained
    • ½ cup sweetened shredded coconut
    • 11 ounces mandarin oranges well drained
    • 10 ounces mini marshmallows

    Instructions

    • In a large bowl whisk together cool whip, sour cream, vanilla extract and lemon juice. Stir in crushed pineapple and coconut until well combined.
    • Fold mandarin oranges and marshmallows into the bowl, mixing until all ingredients are combined.
    • Cover and refrigerate for at least 1 hour before serving.

    Nutrition

    Serving: 1serving | Calories: 186kcal | Carbohydrates: 37g | Protein: 1g | Fat: 4g | Saturated Fat: 2g | Cholesterol: 8mg | Sodium: 51mg | Potassium: 148mg | Fiber: 1g | Sugar: 28g | Vitamin A: 295IU | Vitamin C: 12mg | Calcium: 48mg | Iron: 0.3mg

    The Indulgent Life

    We're T-minus 6 days from school being out of school for the summer, and it's been a crazy whirlwind of dance recitals, gymnastics meets and softball games for my kiddos. I've sat more hours on aluminum bleachers the last month that I probably have my entire life. Or maybe my body just feels it more these days. 😉

    We're super proud of our kiddos and all they are accomplishing, but I'm ready for summer and a less demanding schedule! Which really just means I'll be working on the RV more, but at least that doesn't involve cold, wiggly, back-torturing bleachers.

    Not Your Mama's Smothered Chicken

    By Heather LAST UPDATED March 22, 2021 · FIRST PUBLISHED May 14, 2018, 3 Comments

    Chicken, bacon, and cheese! Who needs more?! This Smothered chicken comes together in about 30 minutes and is a far cry from your traditional smothered chicken and gravy, but is just as tasty. Dare I say it's even better?baked Smothered chicken on a white plate with pasta

    This baked smothered chicken recipe has been kicking around in the deep, dark, archives of the site and I decided it was due time that I give it a little bit of love. In the process, I shot some updated pictures and was reminded of just how. dang. good. this chicken really is!

    I mean, you can't really go wrong with chicken, bacon, and cheese, but this chicken definitely wins its keep here at HLF with all the other flavors it has going on. I've even created this Smothered Chicken Casserole and this One Pan Smothered Chicken Skillet in its honor over the years.

    A lot of the flavor comes from the addition of prepared Caesar Salad dressing. The salad dressing combines with the juices of the chicken and tomatoes as it cooks to form a sort of gravy that keeps it so moist and delicious! Let's take a look!

    How to make Baked Smothered Chicken Breasts

    1. You'll start off by seasoning your chicken with some salt and browning it in a little bit of olive oil on the stovetop. It's not important to cook the chicken all the way through as we'll do that in the oven, just to get a little bit of color on it.
    2. After it's browned, transfer to a baking sheet (use a Silpat or parchment paper to keep cleanup easy) and season with Montreal Chicken seasoning.
    3. Top with Caesar Salad Dressing, two slices of crispy bacon, cheese, onion, and fresh tomatoes.
    4. Bake until cooked through and reaches 165 degrees Fahrenheit.

    How to make Baked Smothered Chicken Breast

    What is Smothered Chicken?

    Well, traditional smothered chicken is a southern dish usually involves lightly breading chicken and cooking it in a type of chicken gravy. It's a vintage recipe that is wildly delicious when done right! I'm not sure what prompted me to call this chicken breast recipe "Smothered Chicken" many years ago when I first made it, but it just felt right, and I don't have the heart to change it now. 🙂

    Smothered Chicken Breast cut in half on white plate

    What Should I Serve with this Baked Smothered Chicken?

    I love to serve these chicken breasts with a big salad because they are so flavorful and hold their own pretty darn well on the dinner table. But, if you're looking for a more hearty side, I recommend these  Super Creamy Slow Cooker Mashed Potatoes or this  Perfect Brown Rice.

    Other Chicken Recipes You Might Like

    • Chicken lo mein recipe
    • Pesto Parmesan Chicken
    • Easy Chicken Cacciatore
    • Barbecue Chicken
    • Honey Dijon Chicken Thighs
    • garlic chicken thighs
    • Ranch Chicken Marinade
    • Simple Grilled Chicken Recipe
    • Chicken Keto Soup
    • Wingers Sticky Fingers
    • Sweet Chili Sauce Chicken
    • Oven Fried Chicken Breast
    • Chicken Ricotta
    • Chicken Curry with Coconut Milk

    📖 Recipe

    Print Recipe
    4.89 from 17 votes

    Smothered Chicken

    Bacon, cheese, tomatoes, and Caesar dressing! What more could you want from a juicy and tender baked chicken breast?!
    Prep Time10 minutes mins
    Cook Time20 minutes mins
    Total Time30 minutes mins
    Course: Main Course
    Cuisine: American
    Keyword: Smothered Chicken
    Servings: 4 servings
    Calories: 255kcal
    Author: Heather Cheney

    Ingredients

    • 4 whole boneless skinless chicken breasts halves
    • ½ cup shredded Monterrey Jack cheese
    • ½ cup shredded Cheddar cheese
    • 1 /3 cup Caesar salad dressing
    • 2 tablespoon chopped chives or green onion
    • 4 slices bacon cooked and cut in half
    • 1 fresh tomato diced
    • Salt
    • Montreal Chicken seasoning (I use McCormick Brand)

    Instructions

    • Preheat oven to 400 degrees.
      Line a baking sheet with foil or parchment paper to cut down on the mess. 
    • Preheat a skillet with 1 tablespoon of olive oil over medium-high heat. Season chicken with salt and place in pan, cooking on both sides. You don’t need to cook the chicken all the way through, but do try to get it nicely browned and caramelized- that’s where the flavor is! 
      Place browned chicken on the cookie sheet and sprinkle with Montreal Chicken Seasoning. Evenly distribute the Caesar dressing over each breast, followed by 2 strips of bacon and top with even amounts of cheese, chives or onions, and tomatoes.
    • Place in oven and bake for about 20 minutes or until the chicken is cooked through and reaches 165 degrees F. Cooking time will vary depending on the thickness of your chicken breast.

    Nutrition

    Serving: 1serving | Calories: 255kcal | Carbohydrates: 2g | Protein: 10g | Fat: 22g | Saturated Fat: 8g | Cholesterol: 42mg | Sodium: 522mg | Potassium: 133mg | Sugar: 1g | Vitamin A: 535IU | Vitamin C: 4.8mg | Calcium: 220mg | Iron: 0.6mg

    The Indulgent Life

    I decided I'm going to give little tidbits of our life here after each recipe post. I love that HLF has morphed and grown into a more recipe-centric place, but do miss being able to go back and see snippets of our family life from when I used to share those more often. So, maybe this is just for me, but you're welcome to stick and around and get a glimpse as well. x- Heather

    We recently purchased a 1978 beast of an RV to renovate and make our own. It's been a super fun project for the hubs and me to work on together, and we're excited to see both what we can turn it into and the places we'll visit with our family in it.

    We've affectionately named the RV "Star Lord" though my three year old is convinced its name is "Head Shoot Gun". Not sure where that name came from, but he's sticking to it and isn't budging.

    Here's Star Lord in all his 1978 glory. We've been working on a lot of the mechanics the last month or so that we've had it and we spent a good chunk of time tearing out the ceiling over the cab, removing some water damage and fixing the frame. But now, we're to the FUN part-- making him look pretty!

    We spent our afternoon yesterday tearing out the old carpet and began to prep for paint! Woot! Fingers crossed prep doesn't take as long as I'm afraid it's going to!


    Bacon Cheeseburger Meatloaf Muffins

    By Heather LAST UPDATED July 17, 2019 · FIRST PUBLISHED May 7, 2018, Leave a Comment

    Bacon Cheeseburger Meatloaf muffins are a fun twist on traditional meatloaf. They are stuffed with cheese and topped with a tangy ketchup sauce that keeps you coming back for more!

    Mini Bacon Cheeseburger Meatloaf Muffins on a Blue Plate

    I’m already kind of a sucker for meatloaf, but these meatloaf muffins might be my favorite way to prepare it. This meatloaf is mixed just like regular meatloaf and then tucked into a muffin tin for baking.

    Breaking the meatloaf mix into individual portions reduces the cooking time substantially, putting dinner on your table a lot quicker and gives you time to whip up a side or two like this Roasted Broccoli of Insanity or Super Creamy Slow Cooker Mashed Potatoes.

    The part of this recipe that I think really puts these mini meatloaves over the top, is the addition of a tangy ketchup sauce and french fried onions. The sauce is similar to your traditional ketchup-based meatloaf sauce and includes brown sugar and Worcestershire sauce. The french fried onions add crunch and excellent flavor.

    Meatloaf mix in non-stick pan with cheese slices on top

    Helpful Tips for Making your best Meatloaf Muffins

    • Spray your muffin pan with non-stick cooking spray WELL! Doing this will ensure that your muffins will release from the pan easily and make washing the pan easy, too!
    • Use a medium-lean ground beef. Look for meatloaf that is right around 10% fat. This will give the meat enough fat to stay moist but isn't so fatty it will be swimming in grease while cooking.
    • Don't over-fill your muffin cups. Place about 1 ½ tablespoons of meatloaf mixture into the bottom of each cup, top with a slice of cheese and cover with an additional 1 ½ tablespoons.
    • When done cooking, remove your cheeseburger meatloaf muffins from the muffin tin after cooling for 5 minutes. Take them out too soon and they may fall apart, wait too long and the cheese will cool, making it harder to remove them from the pan.

    French Fried onions on top of cheeseburger meatloaf muffins

    Can I freeze meatloaf muffins before cooking?

    Yes! I've frozen prepared meatloaf mix many times and had it turn out great. To make meatloaf muffins for the freezer, prepare the recipe through putting the sauce on top and omit the french fried onions.

    Place the muffin tin in the freezer and freeze until firm. If you'd like to free up your muffin tin, you can pop the frozen meatloaf muffins out of the pan and place in a Ziplock bag until ready to bake. When ready, place the frozen muffins back into the muffin tin, allow to defrost, top with french fried onions and bake as directed in the recipe.

    Please note that freezing raw onion can intensify its flavor. I've never noticed it being too overbearing when freezing meatloaf mix, but if you are particularly sensitive to onion flavor, you may want to reduce the amount of onion in the recipe.

    Bacon Cheddar Mini Meatloaf Muffins on a blue plate with french fried onions on top

    Tools I Recommend for Making Meatloaf Muffins

    • A Sturdy Muffin Tin – A good quality non-stick muffin tin will help the muffins cook more evenly and allow for easier removal. I love these Wilton Brand pans.
    • Small Silicone Spatulas – These small silicone spatulas are perfect for running around the edges of your muffin tin to ease the meatloaf out. They are also perfect for icing cakes, cupcakes and have lots of other uses!
    • 1 ½ Tablespoon Cookie Scoop - This cookie scoop will make portioning out the meatloaf muffins a breeze and also makes  perfectly-sized cookies!

    Want More Meatloaf Recipes?

    If you like these Cheeseburger Meatloaf Muffins, give my Classic Meatloaf a try or try this one-pot Slow Cooker Version and make some garlic butter potatoes right alongside your meatloaf!


    📖 Recipe

    Print Recipe
    4.67 from 30 votes

    Bacon Cheeseburger Meatloaf Muffins

    Savory mini meatloaves stuffed with cheese and topped with a tangy ketchup sauce and crunchy french fried onions!
    Prep Time15 minutes mins
    Cook Time20 minutes mins
    Total Time35 minutes mins
    Course: Main Course
    Cuisine: American
    Keyword: Meatloaf Muffins
    Servings: 12 muffins
    Calories: 319kcal
    Author: Heather Cheney

    Ingredients

    • 6 strips bacon finely chopped
    • 1 ½ pounds ground beef 10% fat
    • 2 whole eggs
    • ¾ cup milk
    • ½ cup white onion finely chopped
    • ⅔ cup saltine crackers crushed
    • 1 teaspoon kosher salt
    • ½ teaspoon rubbed sage
    • 1 teaspoon dried dill weed
    • 6 ounces sharp cheddar cheese cut into small squares
    • ½ cup french fried onions

    Sauce

    • ½ cup ketchup
    • ¼ cup brown sugar
    • ½ teaspoon Worcestershire Sauce

    Instructions

    • Preheat oven to 350 degrees and spray a muffin tin with non-stick cooking spray.
    • Combine ketchup, brown sugar, and Worcestershire sauce in a small bowl and set aside.
    • Combine bacon, ground beef, eggs, milk, onion, saltines, salt, sage and dill in a mixing bowl. Mix until just combined-- do not overmix. 
    • Place 1 ½ tablespoons of meatloaf mix into the bottom of each muffin well. Gently press meat into the tin and top with a slice of cheese. Cover cheese with an additional 1 ½ tablespoons of meat. 
    • Spoon about 1-2 teaspoons of sauce over each muffin and sprinkle with french fried onions.
    •  Bake meatloaves for 20 minutes or until onions are browned and sauce is bubbly. Remove from oven and allow to rest for 5 minutes before removing from muffin tin. 

    Nutrition

    Serving: 1muffin | Calories: 319kcal | Carbohydrates: 12g | Protein: 15g | Fat: 22g | Saturated Fat: 9g | Cholesterol: 64mg | Sodium: 553mg | Potassium: 262mg | Sugar: 7g | Vitamin A: 225IU | Vitamin C: 0.9mg | Calcium: 138mg | Iron: 1.5mg


    Perfect Pan Seared Salmon w/ Blackberry Balsamic Sauce

    By Heather LAST UPDATED October 1, 2019 · FIRST PUBLISHED May 3, 2018, 4 Comments

    Love Salmon but don't know how to make it well? This post is for you! You won't believe how easy it is to make perfectly pan-seared salmon with super crispy skin and a moist and tender center. To make it even better, we're topping it with a blackberry balsamic sauce that is out of this world delicious!

    Pan Seared Salmon on a white plate

    I'm serious when I say cooking perfectly pan seared salmon with crispy skin is simple. All you need is a few simple guidelines and tips, and you'll be making the best salmon that ever came out of your kitchen.

    But, since salmon cooks so quickly, we need to make the sauce first, so it's ready when the salmon is! The sauce we're making is blackberry and balsamic vinegar reduction that is tangy and sweet and pairs perfectly with the rich salmon.

    Frozen Oregon Blackberries in a bowl

    We're using these gorgeous frozen Oregon blackberries in our sauce, and if you didn't know it already, I'm a HUGE Oregon berry fan. Growing up in Southern Oregon I spent many a summer day with purple-stained fingertips and blackberry seeds in my teeth.

    How to Make Blackberry Balsamic Sauce

    To make the glaze, you'll combine frozen blackberries, balsamic vinegar, honey, and dried rosemary in a small saucepan and simmer until it's reduced by about half. I like to strain my sauce through a mesh colander to catch the seeds and herbs and then set aside until ready to use.

    How to Make Pan Seared Salmon

    1. Start with good salmon- Fresh salmon is bright in color and will spring back into place when pressed with your fingertip.
    2. Dry Your Salmon- Press each side of the filet with a paper towel to remove any excess moisture. This excess moisture will cause the skin to stick to the pan if not removed, so dry it well.
    3. Season Well- Well seasoned food doesn't season itself :). Use a large grain salt like Kosher so you can see how much you are putting on and season both the front and back of the filet. It's best to season fish just before cooking so the moisture being drawn from the salt doesn't move down to the skin and prevent it from becoming crispy.Salmon Filets on a cutting board
    4. Preheat The Pan- Pour a thin layer of neutral-tasting vegetable oil (like canola) into the bottom of a heavy bottomed skillet. Stainless steel or cast iron work best as they cook more evenly. Preheat your pan and over medium-high heat for at least 5 minutes. If the pan isn't hot enough it will actually cause the skin to stick, making it hard to flip without tearing the fillet.
    5. Lower Heat and Add Salmon Skin Side Down- While you want the pan hot when you first put the fish in, you want to actually cook the salmon at a medium-low heat. Cooking it at a high heat will overcook the outer layers and not render the fat under the skin properly. So just before adding the fish, lower the heat to medium-low.
    6. Press Salmon Gently Into the Pan- As soon as the salmon hits the pan, use a flexible spatula to gently press the fish into the bottom of the pan and hold for about 10 seconds. When the skin hit the hot pan, it will want to curl and buckle, causing the fish to cook unevenly. Pressing it into the pan will prevent this from happening.
    7. Don't Flip Until 90% Cooked - Allowing the salmon to cook skin side down for the majority of the time will allow the fat under the skin to render and also insulates the fish from overcooking. The fillets pictured below took about 5 minutes to reach a perfect-for-me medium-rare temperature of 120 degrees F. Salmon skin side up in pan
    8. Cook other Side- Once your salmon is at the temperature you'd like (rare to well done), gently flip using a flexible spatula and fork to help guide it onto the other side without splattering the oil. Cook just briefly-- about 30 seconds to a minute- since it's already mostly cooked through. Transfer to a paper towel-lined plate.
    9. Let It Rest- Just like any other cut of meat, you want to let the salmon rest for a few minutes before cutting into it to let the juices redistribute.
    10.  Serve with Blackberry Balsamic Sauce- Drizzle a couple of spoonfuls of the sauce you made earlier over the fish and be prepared for Pan Seared Salmon goodness!

    Pan Seared Salmon on White plate with Blackberry Balsamic Sauce

    Tools I Recommend for This Pan Seared Salmon Recipe

    • Flexible Fish Spatula: This spatula is made specifically for turning fish as it is lightweight and flexible, allowing you to get under tender pieces of fish without damaging the filet. They are inexpensive, and I definitely recommend getting one if you love cooking fish!
    • Stainless Steel Skillet: A quality Stainless Steel skillet will give you the seared meat of your dreams! Stainless steel is excellent at heat retention and cooks evenly.
    • Mesh Strainer: Mesh strainers have multiple uses and are great in this recipe for straining the blackberry balsamic sauce. I love this set as it comes with three different sizes of strainers, so you always have one that fits the job.

    Pan Fried Crispy Skin Salmon with Blackberry Balsamic Sauce

    Want More Easy Fish Recipes?

    • Oven Baked Pesto Tilapia 
    • Maple Garlic Baked Salmon
    • Sweet Chili Lime Salmon
    • The Best Broiled Salmon

    📖 Recipe

    Pan Seared Salmon on White plate with Blackberry Balsamic Sauce
    Print Recipe
    4.82 from 22 votes

    Perfect Pan Seared Salmon + Blackberry Balsamic Sauce

    If you've been yearning to learn how to make pan seared salmon, this recipe is for you! Top with this tangy and delicious sauce and you have a meal that is easy enough for weeknights and elegant enough for company. 
    Prep Time10 minutes mins
    Cook Time30 minutes mins
    Resting Time5 minutes mins
    Total Time45 minutes mins
    Course: Main Course
    Cuisine: American, French
    Keyword: easy, fish skin, seared
    Servings: 4 servings
    Calories: 377kcal
    Author: Heather Cheney

    Ingredients

    • 1 cup frozen Oregon Blackberries
    • 1 cup balsamic vinegar
    • ¼ cup honey
    • 1 teaspoon dried rosemary
    • 4 fresh salmon fillets 5-6 ounces each with skin on
    • kosher salt and pepper
    • canola oil

    Instructions

    • In a small saucepan heat blackberries, balsamic vinegar, honey and rosemary until simmering. Crush blackberries with the back of a spoon until all are broken apart. Cook on a medium-low simmer until reduced by half and the mixture coats the back of a spoon.
    • Pour sauce through a fine mesh strainer to separate the seed and herbs from the sauce. Discard seeds and set the sauce aside. 
    • Heat a thin layer of oil over medium-high heat in a stainless steel or cast iron skillet. Preheat for about 5 minutes.
    • Salt and pepper fish on all sides and carefully add, skin side down, to skillet, gently pressing down on top of each fillet with a flexible spatula after each addition for about 10 seconds to set the skin. 
    • Cook fish for about 5 minutes without flipping or until your desired temperature-- 125 degrees for Medium-Rare, 145 degrees for medium-well. 
    • Gently flip fish over using a spatula and a fork to ease it over onto the other side and cook just briefly to get some color on top- about 30 seconds to a minute. 
    • Remove fish from pan and place on a paper towel-lined plate. Allow to rest for 5 minutes before serving. 
    • Serve with the blackberry balsamic sauce. 

    Nutrition

    Serving: 1serving | Calories: 377kcal | Carbohydrates: 31g | Protein: 34g | Fat: 10g | Saturated Fat: 1g | Cholesterol: 93mg | Sodium: 90mg | Potassium: 973mg | Fiber: 1g | Sugar: 28g | Vitamin A: 145IU | Vitamin C: 7.6mg | Calcium: 48mg | Iron: 2.1mg

    One Pan Sour Cream Chicken Enchilada Skillet

    By Heather LAST UPDATED August 31, 2020 · FIRST PUBLISHED April 23, 2018, 59 Comments

    This One Pan Sour Cream Chicken Enchilada Skillet gives you all the flavor and deliciousness of hand-rolled sour cream chicken enchiladas without all the work! It's cheesy, creamy, zesty and your family is going to love it!One Pan Sour Cream Chicken Enchilada Skillet

    Alright, folks here's the deal. I love sour cream chicken enchiladas with a giant pink puffy heart, but I hardly ever make them. By the time dinnertime rears its ugly head, the last thing I want to do is attempt to roll up enchiladas (like these delicious green chile and cheese ones) while my toddler plays the part of Godzilla in my kitchen.

    Seriously, this kid.

    Is it a boy thing? My girls were not climbers and into everything like he is. It's about all I can do every day to keep him from killing himself, let alone make some dang enchiladas.

    So, we make skillet chicken enchiladas. They have all the flavor of your normal enchiladas but take 300% less work! Are you sold yet?

    How to Make Sour Cream Chicken Enchilada Skillet

    Step 1.) Make the Sour Cream Enchilada Sauce

    The Sour Cream Enchilada Sauce is what makes this recipe, and it's basically a thickened chicken broth, seasoned up and studded with green chiles and black olives.

    Step 2.) Cook and Shred the Chicken

    Once the sour cream enchilada sauce is made, you're going to cook the chicken right in it! Place your chicken breasts right into the sauce to cook at a low simmer for about 15 minutes. Once the chicken is cooked, you'll take it out of the sauce, shred it up, stir some sour cream into the sauce and put the chicken back in.

    Chicken being poured into sour cream enchilada sauce

    Step 3.) Add Tortillas

    Enchiladas wouldn't be enchiladas without tortillas, right? You'll cut some corn tortillas into bite-sized squares and add them right into the sour cream sauce and chicken.

    Cut tortillas for sour cream enchiladas skillet

    Give it a stir.

    Stirring the tortillas into the sour cream enchilada sauce

    Step 4.) Add The Cheese!

    Top the entire skillet with cheese, cover and cook for another 5-8 minutes until bubbly. Once it's done, you'll have something that looks something like this. Not too shabby, right?

    Chicken Enchilada Skillet with Sour Cream Sauce in Non-Stick Pan

    Seriously, if you're a chicken enchilada fan like I am, this One Pan Sour Cream Chicken Enchilada Skillet is your new best friend.

    Cooking Tips for Sour Cream Chicken Enchilada Skillet

    I've had a few people comment that this recipe doesn't have enough spice or kick to it. The recipe as written will give you a sauce that is creamy, just lightly seasoned and lets the flavor of the chicken, cheese, and tortillas come through-- like the sour cream chicken enchiladas that I grew up eating! 🙂

    This mild sour cream sauce is meant to be just that-- mild! So if you are looking for a more tangy and spicy sauce, like red enchilada sauce, you can substitute 2 cups canned red enchilada sauce for the chicken broth, flour, and butter.

    You can still stir in the sour cream to make a creamy sauce if you'd like. You can even make your own Homemade Enchilada Sauce, or just make one of these awesome recipes-- Easy Beef Enchilada Skillet or Chicken Black Bean Enchilada Skillet

    Can I Freeze This Sour Cream Chicken Enchilada Skillet?

    Yes, just like its full-blown enchilada cousin, this skillet freezes and reheats well.

    Tools Used for This Sour Cream Chicken Enchilada Recipe

    • Better Than Boullion: I use a lot of chicken/beef/vegetable broth in my recipes because it adds such nice flavor, but I don’t love keeping cans or cartons of it in my pantry. For this reason (and more) I use this broth base anytime I call for broth in my recipes. It only takes one teaspoon of the base to make 1 cup of flavorful broth and can be stored for quite a while in the refrigerator.
    • Anolon Nouvelle Copper Non-Stick Skillet: These non-stick pans are metal utensil safe and last a long time. I've been using Anolon's pans exclusively for the past five years and am still in love with them!

    Want More Easy One Pan Meals?

    • One Pan Easy Chicken Cacciatore
    • One Pan Crack Bean Burritos
    • One Pan Smothered Chicken Skillet
    • One Pan Cheeseburger Macaroni

    Other Popular Recipes People Really Like

    • Barbeque Chicken
    • Chocolate Chunk Pizookie
    • Instant Pot Brisket


    📖 Recipe

    One Pan Sour Cream Chicken Enchilada Skillet
    Print Recipe
    4.47 from 334 votes

    One Pan Sour Cream Chicken Enchilada Skillet

    Cheesy, creamy, zesty and so much easier than spending your day rolling enchiladas up, this sour cream enchilada skillet become your new favorite weeknight meal!
    Prep Time5 minutes mins
    Cook Time30 minutes mins
    Total Time35 minutes mins
    Course: Main Course
    Cuisine: American, Tex-Mex
    Keyword: chicken breast, creamy, easy dinner
    Servings: 6 Servings
    Calories: 460kcal
    Author: Heather Cheney

    Ingredients

    • 3 tablespoons butter
    • 3 tablespoons all purpose flour
    • 2 cups chicken broth
    • ½ teaspoon kosher salt
    • ⅛ teaspoon chipotle chili powder optional
    • ¼ teaspoon oregano
    • 4 ounces chopped green chiles
    • 4 ounces chopped black olives
    • 3 whole boneless skinless chicken breast halves
    • 1 cup sour cream
    • 12 whole corn tortillas cut into bite-sized pieces
    • 2 cups colby-jack cheese grated

    Instructions

    • In a large skillet, heat butter over medium heat until melted. Stir in flour, cook for 1 minute and whisk in chicken broth. Continue stirring until smooth and thickened-- about 2-3 minutes.
    • Stir chipotle chili powder, salt, oregano, green chiles and black olives into the sauce and place chicken breasts into pan. Bring to a simmer, reduce heat to low, cover and cook about 15 minutes or until chicken is cooked through.
    • Remove chicken from pan, leaving the heat on low, and place chicken on a plate to shred into bite-sized pieces.
    • Stir sour cream into the sauce and return chicken to the pan along with the tortillas. Stir until combined and top with grated cheese. Cover pan and cook for 5-8 minutes until bubbly and the cheese is melted.

    Nutrition

    Serving: 1serving | Calories: 460kcal | Carbohydrates: 30g | Protein: 15g | Fat: 32g | Saturated Fat: 17g | Cholesterol: 77mg | Sodium: 1220mg | Potassium: 298mg | Fiber: 4g | Sugar: 1g | Vitamin A: 960IU | Vitamin C: 12.3mg | Calcium: 409mg | Iron: 1.7mg

    Indian Butter Chicken Recipe

    By Heather LAST UPDATED August 7, 2019 · FIRST PUBLISHED March 21, 2018, 1 Comment

    Rich, creamy, and fragrant, this Indian Butter Chicken Recipe is just about perfect. It's easy to prepare and just might make you think twice about running out for take-out the next time you're in the mood for Indian food.Indian Butter Chicken on rice with a spoon

    Indian Butter Chicken Recipe

    Last week I professed my love for all things curry and this butter chicken curry is no exception. I can't claim that this recipe is necessarily "authentic", but it sure hits the spot when I'm craving it.

    How to Make Butter Chicken

    Traditionally, Indian Butter Chicken is cooked in a tandoori oven after marinating for several hours in a cream, yogurt and spice mixture and served in a mild curry sauce with a high ratio of butter.

    This easy butter chicken recipe skips the marinade and cooks the chicken in the oven with a coating of garam masala. The sauce is made with butter, caramelized onion, coconut milk, tomato sauce, heavy cream and spices. I often refer to the sauce as "Indian Alfredo" because of its high butter and cream content. It's heavenly!

    What is Butter Chicken?

    Butter chicken is a mild, creamy chicken curry that was actually created on accident by three Indian restauranteers at their Dehli restaurant in the 1950's. They combined leftover chicken in a tomato gravy with a rich cream and butter sauce, and Butter Chicken was born! It's definitely one of the more well-known and widely eaten Indian dishes in the U.S.

    Can I Make Butter Chicken Without Cream?

    I wish I could wave my magical calorie wand and give you instructions for making this easy butter chicken recipe without cream, but I just can't do that in good conscience. Butter chicken without the cream or butter wouldn't be butter chicken! The rich, velvety sauce make this dish what it is.  So, my recommendation is to save up your calories, make a batch and enjoy!

    Easy Butter Chicken recipe in bowl

    Other Curry Recipes You Might Totally Dig

    • Basic Chicken Curry with Coconut Milk
    • Chickpea and  Sweet Potato Curry
    • Coconut Curry w/ Fried Tofu
    • Totally Awesome Mixed Vegetable Curry

    Tools Used In Making Butter Chicken Curry

    • Ninja 3-in-1 Cooking System: I've owned this slow cooker for about six years (when they were first introduced), and I still love it. The stovetop feature allows me to sear and cook meats before allowing them to slow cook (fewer dishes) and there's a bake feature as well.

    📖 Recipe

    Indian Butter Chicken on rice with a spoon
    Print Recipe
    4.91 from 22 votes

    Indian Butter Chicken Recipe

    Rich, creamy, and fragrant, this Indian Butter Chicken Recipe is just about perfect. It's easy to prepare and just might make you think twice about running out for take-out the next time you're in the mood for Indian.
    Prep Time10 minutes mins
    Cook Time30 minutes mins
    Total Time40 minutes mins
    Course: Main Course
    Cuisine: Indian
    Keyword: garam masala, heavy cream, Slow Cooker
    Servings: 6 servings
    Calories: 779kcal
    Author: Heather Cheney

    Ingredients

    • ¾ cup salted butter
    • 1 onion chopped
    • pinch of baking soda
    • 1 tablespoon garlic minced
    • 1, 15 ounce can tomato sauce
    • 1 , 14 ounce can coconut milk 
    • 2 teaspoons kosher salt
    • ½ teaspoon cayenne pepper more or less if you want
    • 2 tablespoons + 1 teaspoon garam masala SEE NOTE 1
    • 2 pounds boneless skinless chicken breast  cut into 1 ½" pieces
    • 1 ½ cup heavy cream
    • Fresh Cilantro
    • Lemon Juice

    Instructions

    Stovetop Preparation:

    • Melt butter over medium heat and add onion and pinch of baking soda. Cook, stirring frequently until the onions are golden and caramelized. Stir in garlic and cook an additional minute followed by the garam masala and cayenne pepper. Cook for 1 minute or until the spices are aromatic.
    • Stir in tomato sauce and coconut milk, salt. 
    • Add chicken pieces to the sauce and simmer on low until chicken is cooked through and tender. About 20 minutes. 
    • Stir the heavy cream into the sauce and chicken and allow to heat back up. Garnish with fresh cilantro and lemon juice, serve over steamed rice. 

    Slow Cooker Preparation:

    • Melt butter over medium heat and add onion and pinch of baking soda. Cook, stirring frequently until the onions are golden and caramelized. Stir in garlic and cook an additional minute, followed by the garam masala and cayenne pepper. Cook for 1 minute or until aromatic.
    • Stir in tomato sauce and coconut milk and salt. Pour sauce into slow cooker and stir in chicken.
    • Cook on low for 6 hours (High for 3) or until the chicken is tender. Stir heavy cream into the slow cooker, cover and let cook an additional 15 minutes or until hot. Garnish with lemon juice and fresh cilantro. Serve over rice.

    Notes

    Garam Masala is a spice blend typically found in most grocery store spice aisles. If you'd like to make your own, it's pretty easy to do. This is the recipe I use. Note that not all Garam Masala spice mixes will taste the same but will give similar results in your Butter Chicken.
    Garam Masala:
    • 1 tablespoon ground cumin
    • 1 ½ teaspoons ground coriander
    • 1 ½ teaspoons ground cardamom
    • 1 ½ teaspoons ground black pepper
    •  1 teaspoon ground cinnamon
    • ½ teaspoon ground cloves
    • ½ teaspoon ground nutmeg
    1. Combine all ingredients and store in an airtight container until use. 

    Nutrition

    Calories: 779kcal | Carbohydrates: 9g | Protein: 36g | Fat: 67g | Saturated Fat: 45g | Cholesterol: 239mg | Sodium: 1581mg | Potassium: 1033mg | Fiber: 1g | Sugar: 4g | Vitamin A: 2025IU | Vitamin C: 9.9mg | Calcium: 81mg | Iron: 3.5mg

    Beef Tips and Gravy

    By Heather LAST UPDATED March 22, 2021 · FIRST PUBLISHED March 19, 2018, 5 Comments

    Beef Tips and Gravy are like the ugly step kids of pot roast and often don't get the recognition they deserve. This recipe creates a rich and velvety sauce that the beef simmers away in until tender and is easily made in the slow cooker or Instant Pot. Step out of the shadows, beef tips, it's your turn to shine. Beef tip with gravy and potatoes in a white bowl

    Beef Tips and Gravy

    I'm not here to rag on pot roast, but sometimes, it get's all the glory. What about the little guys, huh? These little beef tips pack a lot of flavor, especially when paired with a hearty gravy like this recipe has.

    What are Beef Tips Anyhow?

    Basically, any trimmings from larger roasts can be labeled "Beef Tips" at your grocery store depending on the butcher. Traditionally they were the trimmings off tenderloin and sirloin roasts (2 very tender cuts), but unless it's noted as such I would treat them like stew meat because you can never know for sure unless you really get to know your butcher.

    What to Serve With Beef Tips and Gravy?

    We most often eat beef tips and gravy over rice, but egg noodles or mashed potatoes are a great option as well.

    How to Cook Beef Tips and Gravy

    Both the slow cooker and Instant pot preparation instructions will be given in the recipe card below. The two preparations don't vary too much aside from the cooking time.

    Forkful of beef tips and gravy made in a pressure cooker

    Want more Easy Beef Recipes?

    • Crock pot Ranchers Roast Beef and Gravy
    • Hearty Slow Cooker Vegetable Beef Soup
    • Easy Beef Enchilada Skillet
    • Braised Beef Short Ribs

    Tools Used in Making Beef Tips and Gravy

    • Instant Pot: This is the model that I have and LOVE. It’s been with me for over a year, and I’ve definitely put it through the ringer, but still works like new! It’s changed the dinnertime routine at our house and helps me make meals in under an hour that used to take HOURS!
    • Ninja 3-in-1 Cooking System: I've owned this slow cooker for about six years (when they were first introduced), and I still love it. The stovetop feature allows me to sear and cook meats before allowing them to slow cook (fewer dishes) and there's a bake feature as well.

      📖 Recipe

      Beef tip with gravy and potatoes in a white bowl
      Print Recipe
      4.85 from 13 votes

      Beef Tips and Gravy

      Beef Tips and Gravy are like the ugly step kids of pot roast and often don't get the recognition they deserve. This recipe creates a rich and velvety sauce that the beef simmers away in until tender and is easily made in the slow cooker or Instant Pot. Step out of the shadows, beef tips, it's your turn to shine. 
      Prep Time10 minutes mins
      Cook Time20 minutes mins
      Pressure Release15 minutes mins
      Total Time45 minutes mins
      Course: Main Course
      Cuisine: American
      Keyword: creamy, mashed potatoes, tender
      Servings: 6 Servings
      Calories: 313kcal
      Author: Heather Cheney

      Ingredients

      • 2 pounds beef tips
      • ¾ teaspoon kosher salt
      • ½ teaspoon black pepper
      • ¼ cup olive oil divided
      • 1 pound white mushrooms thinly sliced
      • 1 onion thinly sliced
      • 2 cloves garlic minced 
      • 1 tablespoon tomato paste
      • ¼ teaspoon thyme
      • 3 tablespoons flour
      • 1 ¾ c beef broth
      • 1 tablespoon Worcestershire sauce
      • 1 tablespoon fresh parsley chopped
      • 1 teaspoon red wine vinegar

      Instructions

      Slow Cooker Preparation:

      • Heat 2 tablespoons of oil in a skillet, season beef with salt and pepper, and brown beef on all sides, working in batches if needed. Transfer meat to slow cooker and sprinkle flour and thyme over the beef tips, tossing to combine. Remaining 2 tablespoons of oil are not needed in the slow cooker.
      • Top browned beef tips with mushrooms, onions, and garlic. Whisk beef broth with tomato paste and pour into the slow cooker. 
      • Cover and cook on low for 6 hours (3 hours on high) or until beef is tender. Stir Worcestershire, parsley and vinegar into the finished gravy, seasoning with additional salt if needed. 

      Instant Pot Preparation:

      • Heat 2 tablespoons of oil in the Instant Pot on "Saute" mode. Season beef tips with salt and pepper and brown in batches. Removing beef and placing on a plate once browned.
      • Add 1 tablespoon of oil to the pot and stir in mushrooms and onions. Cook, stirring frequently until the mushrooms have released a lot of their moisture and the onions start to become tender-- about 5 minutes. Stir in garlic and tomato paste, followed by the remaining tablespoon of oil, thyme and flour. Stir well. 
      • Pour beef broth into the pot, scraping the bottom of the pot to release all the cooked on bits at the bottom. Make sure to do this step thoroughly. 
      • Add beef back to the pot, secure lid, and set to cook on high pressure for 20 minutes. Allow pressure to release naturally.
      • Stir Worcestershire, parsley and red wine vinegar into the finished gravy. Season with additional salt as needed and serve.

      Nutrition

      Serving: 1serving | Calories: 313kcal | Carbohydrates: 8g | Protein: 36g | Fat: 14g | Saturated Fat: 3g | Cholesterol: 83mg | Sodium: 693mg | Potassium: 864mg | Fiber: 1g | Sugar: 2g | Vitamin A: 95IU | Vitamin C: 5.1mg | Calcium: 46mg | Iron: 3.7mg


    The Best Super Moist Oven Baked BBQ Chicken

    By Heather LAST UPDATED March 21, 2022 · FIRST PUBLISHED March 14, 2018, 125 Comments

    Baked chicken breast on a baking sheet covered in bbq sauce

    Today we're talking about baking chicken breasts to moist, juicy perfection, smothering them with BBQ Sauce and consuming immediately! Are you ready for this deliciousness?

    Today's recipe for chicken is moist and juicy. And while we're focusing on smothering it with barbecue sauce, this preparation can be used on just about any flavor chicken you can dream up. Just marinate, season, bake and enjoy.

    Why This Recipe Works

    In a nutshell, this recipe uses bone-in chicken breasts and a flavorful marinade. Both of these things help the chicken stay moist and juicy while cooking in the oven. Then, you'll brush the chicken with bbq sauce during the last few minutes of cooking so that it forms a sticky bbq sauce topping and makes the chicken irresistible. 

    BBQ Chicken vs. Grilled Chicken

    When someone says "bbq chicken" you think one of two things, right? There's the barbeque chicken that is cooked on a grill or smoker and there's the chicken that is baked in the oven with barbecue sauce. This recipe is the latter. If you'd like some recipes for grilled chicken, try this Gorgeous Grilled Chicken recipe, my Garlic Ranch Chicken Marinade, or my go-to recipe for Basic Grilled Chicken.

    What Kind of Chicken Should I Use?

    The key is to start with bone-in, half chicken breasts. Boneless and skinless chicken has its place in the poultry kingdom, but not here. We want the bone because it keeps the meat from drying out and imparts excellent flavor. Since we're smothering this chicken with BBQ sauce, I'm going to take the skin off, but I often leave it on if I'm cooking it without a sauce. Leaving it on will naturally baste the chicken as it cooks and also crisps up nicely if you like that sort of thing. I'm kind of a skin hater so even if I leave it on to cook I rarely eat it.

    half bone-in chicken breasts in package

    The Key To Moist, Flavorful BBQ Chicken

    Marinating is all about adding flavor and moisture to the meat.  I'm using a combo of olive oil, lemon juice, smoked paprika (for that smoky BBQ flavor), and minced garlic. If you don't have smoked paprika, I definitely suggest you get some! It has such good flavor and gives a nice smoky flavor to anything you add it to.

    Olive oil, paprika, fresh lemon and garlic

    How To Make Oven Baked BBQ Chicken

    Step 1.

    Start by mixing up the marinade and pouring over the chicken in a ziplock bag. I use a bag as opposed to a bowl because you don't have to use very much marinade to cover the chicken and it seems to marinate more evenly. Place in the fridge.

    Raw chicken marinating in a bag

    Step 2.

    Place the chicken in the fridge for at least an hour or up to overnight. Allowing the chicken to marinade past 24 hours could result in some funny-textured chicken though.

    Step 3.

    Take the chicken out of the marinade and place on a baking sheet. Season with liberally with kosher salt and pepper and pop in a 350-degree oven for 20 minutes.

    Sprinkling salt on the marinated chicken

    Step 4.

    After 20 minutes your chicken will be about half-way done depending on the size of the breast. Brush each breast with your favorite Barbecue sauce and return to the oven.

    Brushing bbq sauce on a baked chicken breast

    Step 5.

    Repeat the application of BBQ sauce to the chicken every 5 minutes until the chicken is cooked through. Standard chicken breasts take a total of 35-40 minutes, so 4-5 brushings with the sauce should do ya. If you have a thermometer, insert it into the thickest part of the breast and remove it from the oven when it hits 165 degrees F.

    How do I get that sticky-sweet caramelized sauce on my bbq chicken?

    Taking the time to apply the sauce to the chicken at 5-minute intervals while baking results in a deliciously sticky, glazed exterior that makes me want to lick my fingers just thinking about it.

    BBQ chicken cut on a cutting board with a bottle of bbq sauce

    Frequently Asked Questions About This Recipe

    How Long Should I Marinate Chicken For?

    Chicken can be marinated for up to 24 hours, but any longer than that, the marinade can affect the texture of the chicken.

    What Temperature Is Chicken Done?

    Chicken is fully cooked at 165 degrees Fahrenheit. Use an instant read thermometer to check the temperature and insert into the the thickest part of the chicken for an accurate reading.

    Can I Use Boneless Skinless Chicken Breasts Instead of Bone-in?

    Yes, boneless chicken can be used, but bone-in chicken breasts will give you the moistest, most flavorful chicken.

    Does Chicken Need to Be Covered While Cooking?

    When roasting chicken, like we are here, you do not need to cover the chicken.

    Other Chicken Recipes You Might Like

    • Pesto Parmesan Chicken
    • Easy Chicken Cacciatore
    • Smothered Chicken Breast
    • Honey Dijon Chicken Thighs
    • garlic chicken thighs

    Other Popular Recipes People Really Like

    • One Pan Sour Cream Chicken Enchiladas
    • Chocolate Chunk Pizookie
    • Teriyaki Beef Stir Fry
    • Shoyu Chicken Recipe
    • Ranchers roast beef
    • Instant Pot Brisket

    📖 Recipe

    BBQ chicken cut on a cutting board with a bottle of bbq sauce
    Print Recipe
    4.64 from 427 votes

    Super Moist Oven Baked BBQ Chicken

    Oven Baked BBQ Chicken, baby! Today we're talking about baking chicken breasts to moist, juicy perfection, smothering them with BBQ Sauce and consuming immediately! Are you ready for this deliciousness?
    Prep Time1 hour hr
    Cook Time40 minutes mins
    Total Time1 hour hr 40 minutes mins
    Course: Main Course
    Cuisine: American
    Keyword: Baked BBQ Chicken, BBQ Chicken, Oven Baked BBQ Chicken
    Servings: 4 servings
    Calories: 611kcal
    Author: Heather Cheney

    Ingredients

    • 4 bone-in Chicken Breast Halves
    • 3 tablespoons olive oil
    • 1 ½ teaspoons smoked paprika
    • 2 tablespoons fresh lemon juice
    • 3 cloves garlic minced
    • ½-3/4 teaspoon kosher salt
    • pepper to taste
    • 1 cup favorite prepared BBQ sauce

    Instructions

    • Remove skin from chicken breast halves and place in a large ziplock bag.
    • Combine olive oil, smoked paprika, lemon juice, and garlic in a small bowl and pour over chicken.
    • Let chicken marinade for at least an hour, up to 24 in the fridge.
    • Preheat oven to 350 degrees
    • Remove chicken from bag and place on a baking sheet. Season with salt and pepper.
    • Bake for 20 minutes and brush a layer of BBQ sauce on the chicken. Return to the oven and repeat brushing with BBQ sauce every 5 minutes until the chicken is cooked through, about 15 to 20 minutes longer. Chicken is done when it reaches an internal temperature of 165 degrees F when read with a thermometer inserted into the thickest part of the breast.

    Video

    Nutrition

    Serving: 1chicken breast | Calories: 611kcal | Carbohydrates: 30g | Protein: 47g | Fat: 31g | Saturated Fat: 7g | Cholesterol: 144mg | Sodium: 1168mg | Potassium: 689mg | Sugar: 24g | Vitamin A: 715IU | Vitamin C: 4mg | Calcium: 53mg | Iron: 2.3mg

    Instant Pot Brisket

    By Heather LAST UPDATED October 2, 2020 · FIRST PUBLISHED March 12, 2018, 6 Comments

     This Instant Pot Brisket can be made in any electric pressure cooker or even a slow cooker. In this post, I show you how to cook a tender and juicy brisket using a flavorful rub and a few other tricks that will make it incredible.Best Instant Pot Brisket sliced on wood cutting board

    Instant Pot Brisket

    Each year for my husband's birthday he chooses a "dream" meal for me to cook as his gift. He's had some creative requests over the last 13 years that we've been doing this. My favorite has to be the "Shellfish Tower" that I made about seven years ago-- that was a doozy!

    It's always a fun tradition, and we usually invite friends or family over to enjoy it with us. This year's request was pretty simple-- BBQ brisket, orange rolls, cheese grits, and homemade mac and cheese. Carb-lovers paradise, right?

    So, I decided I'd snap some pics and share the recipe for the Instant Pot Brisket I made. I'll be sharing the recipe for my favorite baked mac and cheese soon as well as for the orange rolls. Get your fat pants ready! Speaking of fat pants, if you need a dessert to go along with this brisket, you gotta try a Pizookie!

    But, first things first!

    Sliced pressure cooker brisket on cutting board with yellow silicone basting brush

    How to Cook Instant Pot Beef Brisket

    Start with flavor. I make a dry rub (recipe below) and rub it over the entire surface of the brisket. I then refrigerate it for at least 8 hours to let the flavor sink in.

    From here it goes into the Instant Pot, Electric Pressure cooker, or slow cooker to be cooked until tender. Brisket is a cut of beef that is made for slow cooking; it needs the long cooking period to break down the connective tissue to make it tender.

    Your Instant Pot Brisket Cooking Time will be about 1 hour 15 minutes but will depend on the size of your cut. If you're slow cooking it, plan on 8-9 hours.

    Once it's cooked, it get's a good helping of your favorite BBQ sauce and then goes under the broiler or on the BBQ to get that irresistible char and caramelization on the top that you want on your meat.

    sliced instant pot brisket on wood cutting board with cup of sauce in background

    Most Asked Questions About Making Beef Brisket

    [sc_fs_multi_faq headline-0="h2" question-0="WHERE IS BEEF BRISKET CUT FROM?" answer-0=" [sc_fs_multi_faq headline-0="h2" question-0="Where Is Beef Brisket Cut From?" answer-0="Brisket is cut from the breast section of beef. A whole brisket is made of 2 different cuts– the flat cut and point cut. Flat cuts are the easiest to find and are typically 5-6 pounds. This is the cut I use." image-0="" headline-1="h2" question-1="How To Trim A Brisket For The Instant Pot" answer-1="A flat cut brisket is lean and topped with a thick fat cap. Since we're not smoking it in this recipe, you don't need a thick fat cap to protect the meat. I like to cut the fat cap down to an even ⅛ inch over the entire brisket." image-1="" headline-2="h2" question-2="How To Slice Beef Brisket" answer-2="Brisket is a unique cut as it remains sliceable even after cooked until super tender as long as you cut across the grain. The lean protein structure of the meat allows it to hold its shape and makes it a great choice for sandwiches. " image-2="" headline-3="h2" question-3="What Does It Mean To Cut Across The Grain" answer-3="When you're ready to cut, take a look at the brisket and see which way the long fibers of the meat are running. You want to cut across those fibers or across the grain at 90 degrees to keep it as tender as possible. " image-3="" count="4" html="true" css_class=""]

    More BBQ Inspired Recipes That You Might Like 

    • Oven Baked BBQ Chicken-- Most Popular Recipe on the Site.
    • BBQ Ribs-- made in the Instant Pot
    • BBQ Ribs-- made in the Slow Cooker
    • Slow Cooker Blackberry BBQ Pulled Pork
    • Slow Cooker BBQ Chicken Taco Salad
    • Saucy Slow-Cooker BBQ Beef Sandwiches

    Other Instant Pot Recipes That Are Favorites

    • Instant Pot Pot Roast (Tavern Style)
    • Instant Pot BBQ Chicken Chili with Pineapple
    • Instant Pot Chicken Fettuccini Alfredo

    Tools Used in Making Instant Pot Brisket

    • Instant Pot: This is the model that I have and LOVE. It’s been with me for over a year, and I’ve definitely put it through the ringer, but still works like new! It’s changed the dinnertime routine at our house and helps me make meals in under an hour that used to take HOURS!
    • OXO Stainless Steel Tongs: These tongs take a beating in my kitchen. They go from the grill for flipping meats to the salad bowl for tossing with very little complaint. They are built like a tank and have silicone grips that make them super easy to use, even with my very small hands.

    📖 Recipe

    Instant Pot Beef Brisket on wood cutting board
    Print Recipe
    4.50 from 22 votes

    Instant Pot Brisket

    This Instant Pot Brisket can be made in any electric pressure cooker or even a slow cooker. In this post, I show you how to cook a tender and juicy brisket using a flavorful rub and a few other tricks that will make it incredible.
    Prep Time10 minutes mins
    Cook Time1 hour hr 15 minutes mins
    Marinade Time8 hours hrs
    Total Time9 hours hrs 25 minutes mins
    Course: Main Course
    Cuisine: American
    Keyword: no smoker, quick, tender
    Servings: 10 servings
    Calories: 1157kcal
    Author: Heather Cheney

    Ingredients

    • 4-5 lb flat cut brisket fat cap trimmed to ⅛"

    Rub:

    • 3 ½ tablespoons smoked paprika
    • 3 tablespoons brown sugar
    • 2 tablespoons kosher salt
    • 1 ½ tablespoon garlic powder
    • 1 ½ tablespoon onion powder
    • 1 tablespoon ground black pepper
    • ¾ teaspoon chipotle chili powder
    • 1 ½ teaspoon ground cumin
    • ¾ teaspoon ground coriander
    • 1 teaspoon oregano
    • ⅓ teaspoon cayenne pepper

    Instructions

    • Combine spice rub ingredients in a bowl and rub over the entire surface of the brisket. Place seasoned brisket on a baking sheet, cover with plastic wrap and refrigerate for 8-12 hours. 
    • Cook per your desired cooking method below. Remove cooked brisket from the pot and place on a baking sheet. Brush with your favorite bbq sauce and place under the broiler for a few minutes or until the sauce starts to caramelize. Alternately you can finish the brisket off on the grill. 

    Instant Pot Cooking:

    • Cut brisket in half so it fits, and place ½ of the brisket in Instant Pot on wire trivet with the fat cap up followed by the remaining half. Add 1 cup water to the pot and set to cook at high pressure for 75 minutes. Allow a natural pressure release for at least 15 minutes and then you can manually release the rest. 

    Slow Cooker:

    • Place brisket in the slow cooker and cook for 8-9 hours on low or until tender.

    Nutrition

    Serving: 1serving | Calories: 1157kcal | Carbohydrates: 7g | Protein: 151g | Fat: 53g | Saturated Fat: 18g | Cholesterol: 449mg | Sodium: 1979mg | Potassium: 2500mg | Fiber: 1g | Sugar: 3g | Vitamin A: 1345IU | Vitamin C: 0.2mg | Calcium: 59mg | Iron: 15mg

    Chicken Curry with Coconut Milk

    By Heather LAST UPDATED March 22, 2021 · FIRST PUBLISHED March 9, 2018, 2 Comments

    This chicken curry with coconut milk recipe is easy, healthy, and simple. It's a creamy and mild yellow curry with fresh spinach and red peppers that my family just adores. Top with roasted cashews and serve with rice for a delicious, quick dinner! Chicken curry made with coconut milk with spinach and peppers in a cast iron skillet

    Chicken Curry with Coconut Milk

    I've always loved bright and boldly flavored curries. One of my favorites is a Thai Eggplant curry that involves more ingredients and steps than I'd like to admit, but the end-result is worth it. But, here's the kicker-- I'm a mom.

    My kids are not always keen on my psychedelic tastebuds and as much as I try to convert them, I don't succeed. So, this mild and creamy coconut chicken curry is our compromise. It has the bright curry flavor I like without overpowering their un-adventurous palates.

    I have high hopes that they'll learn to love the beauty and complexities of curries at some point, but in the meantime, I'll stick with this recipe.

    Close up of easy chicken with coconut milk recipe

    How to Make Chicken Curry with Coconut Milk

    This creamy coconut chicken curry is pretty easy and straight-forward, but there are a few tricks that will make this as absolutely flavorful as it can be.

    1. "Bloom" Your Spices: The flavor compounds in many spices and a handful of herbs are fat-soluble. By heating spices in fat before adding the remainder of the recipe, you can extract a substantial amount of flavor that wouldn't be present by just simmering those spices in the coconut milk.
    2.  Add Baking Soda to your Onions: Adding a pinch of baking soda to your onions raises their PH level and allows them to caramelize much faster which develops that deep, rich flavor.

    Can you Freeze Chicken Curry with Coconut Milk?

    When frozen, coconut milk separates and loses its creamy consistency. Once defrosted it can be re-emulsified with an immersion blender, but that's not something you'd want to do when you have chicken and veggies in it as well.

    So my answer is that yes, it can be frozen, but the consistency will not be the same once defrosted.

    How to Make Chicken Curry with Coconut Milk in the Slow Cooker

    If you'd like to make this easy chicken with coconut milk recipe in the slow cooker, you certainly can.

    I recommend following the written recipe through caramelizing the onion and then adding all ingredients except the spinach and cilantro to the slow cooker. Cook until the chicken is tender and then stir the spinach and cilantro in just before serving.

    Creamy coconut chicken curry in a cast iron skillet

    Other Curry Recipes You Might Like

    • Sweet Potato and Chickpea Curry
    • Coconut Curry w/ Fried Tofu + A Giveaway (Closed)!
    • Easy Basic Mixed Vegetable Curry Recipe
    • Indian Butter Chicken Recipe

    Other Chicken Recipes You Might Like

    • Chicken lo mein recipe
    • Pesto Parmesan Chicken
    • Easy Chicken Cacciatore
    • Smothered Chicken Breast
    • Honey Dijon Chicken Thighs
    • garlic chicken thighs
    • Ranch Chicken Marinade
    • Simple Grilled Chicken Recipe
    • Chicken Keto Soup
    • Wingers Sticky Fingers
    • Sweet Chili Sauce Chicken
    • Oven Fried Chicken Breast
    • Chicken Ricotta
    • Barbecue Chicken

    Tools Used in Making Chicken Curry with Coconut Milk:

    • Lodge Cast Iron Skillet: Cast Iron Skillets are your BEST friend and are totally underrated. Cast iron retains heat really well and allows you to get that irresistible sear on steaks and other meats you can usually only get at a restaurant. Pair this with the fact that they are CHEAP it's a no-brainer.
    • OXO Handheld Vegetable Slicer: I love this little tool when making soup or other skillet meals because it slices small amounts of veggies quickly and easily and I don’t have to dirty a cutting board– I just slice right over the pot! I especially love it for carrots and celery.

      📖 Recipe

      Chicken Curry with coconut Milk
      Print Recipe
      4.37 from 11 votes

      Chicken Curry with Coconut Milk

      This chicken curry with coconut milk recipe is easy, healthy, and simple. It's a creamy and mild yellow curry with fresh spinach and red peppers that my family just adores. Top with roasted cashews and serve with rice for a delicious, quick dinner! 
      Prep Time10 minutes mins
      Cook Time30 minutes mins
      Total Time40 minutes mins
      Course: Main Course
      Cuisine: Thai
      Keyword: beginner, creamy, mild
      Servings: 4 servings
      Calories: 547kcal
      Author: Heather Cheney

      Ingredients

      • 1 tablespoon coconut oil or olive oil
      • 1 tablespoon curry powder
      • ½ teaspoon ground black pepper
      • ½ medium onion finely diced
      • 1 pinch baking soda
      • 2 ½ " piece of ginger peeled and finely minced
      • 4 cloves garlic minced
      • 1, 15 ounce can coconut milk
      • 2 pounds boneless skinless chicken breast thinly sliced
      • 1 ½ teaspoons kosher salt
      • 1 red bell pepper sliced
      • 6 ounces baby spinach
      • ½ cup fresh cilantro chopped

      Instructions

      • Heat oil in a large skillet over medium heat. Stir curry powder and black pepper into oil and cook for about 1 minute, stirring constantly until fragrant. 
      • Stir onion and baking soda into spices and cook, stirring until onions are tender-- about 3-4 minutes. Add ginger and garlic to the pan and cook for 30 seconds followed by the coconut milk and bring to a simmer.
      • Season chicken with the salt and add to the simmering coconut milk with the red pepper. Bring to a boil,reduce heat to low and cover. Cook at a low simmer for about 5-6 minutes or until chicken is cooked through and peppers are tender. 
      • Stir spinach and cilantro into the finished curry and season with soy sauce or fish sauce to taste. Serve with rice. 

      Nutrition

      Serving: 1serving | Calories: 547kcal | Carbohydrates: 9g | Protein: 52g | Fat: 34g | Saturated Fat: 25g | Cholesterol: 145mg | Sodium: 1256mg | Potassium: 1454mg | Fiber: 2g | Sugar: 2g | Vitamin A: 5135IU | Vitamin C: 56.3mg | Calcium: 90mg | Iron: 6.4mg

    Peanut Butter Protein Balls

    By Heather LAST UPDATED March 2, 2021 · FIRST PUBLISHED March 1, 2018, 2 Comments

    Need a sweet but healthy snack? These peanut butter protein balls take just a few ingredients and give a little boost of protein when needed. Just mix together, roll in whatever toppings you'd like, and put them in the fridge ready for snack time! Peanut Butter Protein Balls in a brown bowl

    These no bake protein balls have been my saving grace over the last week. I mentioned a few weeks ago that I've been following a ketogenic diet and, you guys, the sugar cravings have been HARD! It's usually a few hours after lunch that I have the burning desire to shovel immense amounts of candy into my face and so far, I've resisted!

    Sure, there's some amount of willpower working its magic here, but I think I can owe a lot of my success to these beautiful little healthy peanut butter balls. Oh, and this keto chicken soup <-- Seriously good, guys.

    These peanut butter balls are sweet, creamy, and filling!

    Easy peanut Butter balls in a brown bowl

    How To Make Peanut Butter Protein Balls

    My protein balls recipe is pretty simple and can be modified in many different ways. The basic recipe includes peanut butter, vanilla protein powder, vanilla extract, and powdered sweetener. I use powdered Swerve (Erythritol), but you could use powdered sugar or even Stevia.

    I decided to roll mine in unsweetened coconut this time and have rolled other batches in mini chocolate chips (the best way, in my opinion), chopped nuts, and even sprinkles.

    Even the type of nut butter you use can be changed up. Almond butter and sun butter work great in this recipe. You may just need to adjust the amount of powdered sweetener or protein powder you use to get the right consistency.

    Can Protein Balls Be Frozen?

    Yes! In fact, my favorite way to eat these is cold out of the fridge so if you keep them in the freezer you can just pull a few out and let them thaw a bit before eating. Just make sure you store them in an airtight container.

    How Long Do Peanut Butter Balls Last?

    Peanut Butter protein balls need to be refrigerated and will last up to 2 weeks in the fridge in an airtight container. If you choose to freeze yours, you can expect them to last about 30 days in the freezer.

    No bake protein balls in a brown bowl

    Is Peanut Butter Protein?

    Yes! There are 8 grams of protein in 2 tablespoons of peanut butter. In this recipe, about ½ of the protein comes from the peanut butter and the other half from the protein powder. Each (2 teaspoons) protein ball has about 4 grams of protein and will fluctuate depending on the type of protein powder you use.

    Here Are Some Other Snacking-On-The-Go Recipes That You Might Dig

    • Apple Cranberry Granola Cups
    • Easy Baked Pizza Sticks
    • Super Moist Banana Muffins
    • Banana Blueberry Bread (Whole Wheat and Filling)
    • Hummus Made with Black Beans and Avocado

    Other Recipes With Peanut Butter You Might Like, Too

    • Reese's Peanut Butter Popcorn
    • Chocolate Peanut Butter Fudge Bars
    • The BEST Peanut Butter Cookies

    📖 Recipe

    Peanut Butter Protein Balls in a brown bowl
    Print Recipe
    4.69 from 16 votes

    Peanut Butter Protein Balls

    Need a sweet but healthy snack? These peanut butter protein balls take just a few ingredients and give a little boost of protein when needed. Just mix together, roll in whatever toppings you'd like, and put them in the fridge ready for snack time! 
    Prep Time15 minutes mins
    Cook Time0 minutes mins
    Total Time15 minutes mins
    Course: Snack
    Cuisine: American
    Keyword: energy bites, healthy, keto
    Servings: 16 balls
    Calories: 54kcal
    Author: Heather Cheney

    Ingredients

    • ½ cup creamy peanut butter
    • ¼ cup vanilla protein powder
    • ¼ cup powdered sweetener Swerve or powdered sugar 
    • 1 teaspoon vanilla extract
    • ¼-1/2 cup toppings to roll balls in chocolate chips, coconut, sprinkles, etc

    Instructions

    • Combine peanut butter, protein powder, sweetener and vanilla in a bowl and mix until smooth and fully combined. 
    • Use a 2 teaspoon cookie scoop to portion all of the dough and roll each ball in between your palms to form a smooth ball.
    • Roll each ball in desired toppings and place on a plate. Refrigerate until firm and transfer into an airtight container for storage. 

    Nutrition

    Serving: 1ball | Calories: 54kcal | Carbohydrates: 4g | Protein: 3g | Fat: 4g | Cholesterol: 3mg | Sodium: 41mg | Potassium: 59mg | Calcium: 12mg | Iron: 0.1mg

    It's National Peanut Butter Lovers Day!

    Celebrate with me and some of my blogging friends! We're all sharing a peanut butter recipe today-- see what everyone is making!

    • Peanut Butter Lovers Pancakes-- Crumb
    • Triple Peanut Butter Cake-- Ashlee Marie
    • Peanut Butter Butterfinger Cookies-- Creations by Kara
    • Reese's Peanut Butter Bars-- Pretty Providence
    • Peanut Butter Pie-- Simple Stacie
    • Creamy Peanut Butter Chip Pie-- An Italian In My Kitchen
    • Homemade Nutter Butter Cookies-- The Baker Upstairs
    • Easy Peanut Butter Fudge-- Savory Experiments
    • Peanut Butter Chocolate Chip Blondies-- 365 Day of Slowcooking
    • Easy Peanut Butter Granola-- Real Mom Kitchen
    • Peanut Butter Doughnuts with Chunky Peanut Butter Glaze-- Premeditated Leftovers
    • Peanut Butter Cookies-- Namely Marley
    • Peanut Butter Twix Pie-- My Mommy Style
    • Instant Pot Peanut Butter Caramel Cheesecake-- Supergolden Bakes

    Other delicious Peanut Butter Recipes:

    • Lunchroom Peanut butter Bars-- Cupcake Diaries
    • Peanut Butter Smore's Bars-- The Food Charlatan
    • Peanut Butter Rice Krispies Treats-- The Country Cook
    • No-Churn Peanut Butter Ice Cream-- A Thrifty Mom
    • Peanut Butter Cornflake Cookies-- Spend with pennies
    • One Minute Peanut Butter Brownie-- The Typical Mom
    • Peanut Butter Cup Overnight Oats-- Lemon and Zest
    • 3 Ingredient No Bake Peanut Butter Cookies-- The Beaming Baker
    • Fluffernutter Cookies-- Keep It Sweet Desserts
    • Loaded Reese's Peanut Butter Cup Bark-- Wine and Glue

    27 Amazing Peanut Butter Recipes

    Navajo Tacos

    By Heather LAST UPDATED June 18, 2020 · FIRST PUBLISHED February 26, 2018, 12 Comments

    Navajo Tacos, fry bread tacos, Indian tacos; whatever you want to call them they are 100% delicious and the fry bread is much easier to make than you might think! You've gotta try these!Navajo Tacos on a white plate with toppings

    Navajo Tacos

    I never knew what Navajo Tacos were until I moved to Utah after I graduated High School. But BAM! As soon I stepped foot into that state it was like Navajo Tacos were up in my grill 24-7.

    Alright, so maybe I only ate like 4 or 5 of them in my 5-year stint of living in that state but who's counting? My point is Navajo Tacos are delicious and if you've never had one, you should. That totally makes sense, right? Let's make some!

    How to Make Navajo Tacos

    Navajo Tacos = Fry Bread topped with taco fixings, and if you're imagining a Taco Bell Chalupa made with real ingredients, you've pretty much got it figured out. Making good fry bread is super easy as long as you have a little know-how.

    My fry bread recipe only uses two ingredients-- self-rising flour and water. You'll mix the two until it forms a shaggy, still slightly sticky dough. You want the dough to be soft enough to form into pretty thin disks with your fingertips but firm enough to be still manageable with floured hands.

    Once you find that happy place, cover the bowl with some plastic wrap and let it sit for about 30 minutes. Doing this will let the baking powder in the flour activate and will make a lighter bread when fried.

    Navajo Tacos dough being mixed

    Let's talk about deep frying. Please don't ask me if there's a way to bake these because that would be crazy.  I know deep fat frying isn't paleo or whole30 or part of the magic soup diet, but these tacos are worth an extra night at the gym.

    Also, I'm going to ask you to use shortening instead of regular vegetable oil (gasp!). I don't usually use shortening for frying, but it makes all the difference with fry bread and helps it stay light and crisp instead of slightly soggy.

    AND, If you have a candy thermometer, it's time to break it out! You want your fat to stay between 350 and 400 degrees for the whole time you're cooking. The temp will drop as you add bread so keep it on the high end as you're adding in the dough and don't let it go under 350. If the fat isn't hot, enough the dough likes to absorb the oil, and you're then left with a soggy mess.

    Navajo Tacos getting ready to be fried in shortening

    You'll tear off the dough into about golf ball sized pieces and flatten them out into rounds with floured hands. They puff up quite a bit so try to make it as thin as you can.

    Navajo Tacos dough being stretched into a disk

    Gently lower one disk at a time into the fat. If you get a lot of bubbly action as it hits the fat, you've done your job at keeping it hot enough. Good job!

    Navajo Tacos dough being fried in oil

    Flip the bread over once the first side is golden brown and repeat for the remaining side. Once it's fully cooked remove it from the fat and place it on some paper towels to drain and absorb some of the fat.

    Navajo Tacos dough being fried in shortening

    Now that we've got the fry bread going,  I usually just make up this amazing Mexican Style Ground Beef and top it with whatever I have in the fridge that night.

    I typically layer each piece of fry bread with meat, beans, lettuce, tomato, cheese, avocado, and then drizzle on some of this cilantro lime dressing (Cafe Rio copycat)  and it's perfect! Alternately you could ditch the whole taco idea and just slather the fry bread in butter and honey.

    Your call. I like to eat a little bit of both.

    Navajo Tacos meat in cast iron pan

    Watch Me Make Navajo Tacos

    Navajo Tacos on white plate on table

    📖 Recipe

    Navajo Tacos
    Print Recipe
    4.81 from 47 votes

    Navajo Tacos

    Navajo Tacos can be topped any way you like to eat your tacos! Just make up the fry bread and smother it with all your favorites.
    Prep Time10 minutes mins
    Cook Time5 minutes mins
    Resting Time30 minutes mins
    Total Time15 minutes mins
    Course: Main Course
    Cuisine: American
    Keyword: easy, indian fry bread, self-rising flour
    Servings: 8 taco shells
    Calories: 112kcal
    Author: Heather Cheney

    Ingredients

    • 2 cups Self Rising Flour
    • 1 cup Water
    • Shortening for frying

    Instructions

    • Combine the self rising flour and water in a bowl and mix until a shaggy dough forms. You may need to add a bit more water if the dough seems dry. The dough needs to be soft enough to form into disks easily but not too sticky to where it's unmanageable with floured hands. Cover dough and let rest for 30 minutes.
    • Heat shortening in a heavy bottomed pan, using enough to have 2-3 inches of fat in pan. Bring fat to about 380-400 degrees.
    • Break the dough into about golf-ball sized portions and flatten into disks.
    • Carefully lower one disk at a time into the hot fat and cook until golden brown on both sides, flipping halfway through. Remove bread and place on paper towels.
    • Top with taco fixings and enjoy!

    Nutrition

    Serving: 1shell | Calories: 112kcal | Carbohydrates: 22g | Protein: 3g | Sodium: 2mg | Potassium: 31mg | Calcium: 5mg | Iron: 0.3mg

    Crockpot Chili-- My Award Winning Chili Recipe!

    By Heather LAST UPDATED March 21, 2022 · FIRST PUBLISHED February 23, 2018, 6 Comments

    If you're in the market for a good, basic crockpot chili recipe, this one is it! This chuck roast chili is studded with big pieces of beef, chiles, and black beans and comes together super quickly before being slow-cooked for hours. If you have a chili cookoff coming up, I think you're going to want to tuck this award-winning chili in your back pocket for later. 

    Chuck roast beef chili in a white bowl

    Award Winning CrockPot Chili

    What is it about chili cook-offs and why are they so popular? I mean, we don't have pot roast competitions or scalloped potato cook-offs. Why the heck do we feel the need to show our kitchen prowess in the form of meat and beans and spices?

    I mean, chili IS delicious and there are about 25,478 different ways to make it, so I guess that might have something to do with it. But, really, wouldn't you rather your work/church/community sponsor a cinnamon roll bake-off?

    Am I right?

    I digress.

    Being that chili-cookoffs are so popular, I've thrown my hat into the ring more times than I'd probably like to admit and have won more times than I'd like to admit as well. I've got to stay humble, after all. But, some of my favorite award-winning recipes I've used are Instant Pot BBQ Chicken Chili with Pineapple, White Chicken Chili, and this Amazing 30 Minute Chili.

    Why This Crockpot Chili Recipe is Different

    I've used and created a few different recipes over the years, but this crockpot chili recipe is my favorite! It strays just a little bit from a basic chili recipe using two kinds of paprika in addition to chili powder and packs incredible flavor with very little effort. I also use chuck roast instead of ground beef which means big chunks of seasoned tender beef in the finished chili making it phenomenal!

    slow cooked chili in a white bowl with a fork

    How To Make The BEST Crockpot Chili

    Step 1. Pick The Right Kind of Meat

    I love a good chunky chili with big pieces of meat in it! So, I for-go the ground beef with this recipe and head straight for a beef chuck roast. You could use prepackaged/cut beef stew meat from the meat counter, but for this chili but I much prefer to cut my own.

    Typical "stew meat" is made from trimmed bits and pieces of various cuts, with no real uniformity. Cutting your own beef chuck will ensure that you have the meat you want in uniform pieces that will cook evenly.

    How to Cut Chuck Roast: First, pull the roast apart at its major seams (where the fat and silverskin is). Then, with a sharp knife, trim off the thick layers of fat and silverskin. From here you can cut the roast into even pieces, ready for your chili.

    hearty chili in a white bowl with green onions

    Step 2.) Bloom Your Spices

    Slow cookers just make everything easier, right? There's nothing better than throwing everything into a pot and forgetting about it until hours later! But, if you're not careful, they can steal flavor that is otherwise present in other cooking methods. To make sure this doesn't happen with your crockpot chili, you'll want to bloom your spices before adding them to the rest of the ingredients.

    Blooming spices brings their aromatic oils to the surface, creating a stronger more complex flavor.

    How To Bloom Spices: Heat a tablespoon of oil in a non-stick skillet over medium-high heat and add the spices to the hot oil. Stir the spices for one minute, until they become very aromatic and then remove from the heat.

    This small step will increase the flavor of your chili immensely! Just make sure your oil is not too hot, or the spices will scorch.

    Step 3.) Place in Crockpot

    Once you have the right meat picked out and cut and your spices bloomed you're ready to cook! You'll add your beef, sugar, oregano, onion, vinegar, garlic, tomatoes, green chilies, beef broth, beans and salt to the slow cooker, followed by your bloomed  spices and stir. Cover and cook for at least 4 hours on high or until the meat is tender, about 6 hours on low.

    Crockpot chili in a white bowl

    How to Make Crockpot Chili Thicker

    Sometimes crockpot chilis can be a little thin because the slow cooker doesn't allow the same kind of evaporation that stovetop or oven cooking does. My recipe is pretty thick on it's own, but if you'd like to thicken it, masa harina is a great thickener for chili.

    Masa harina is a the flour used in making tortillas, tamales and other Mexican dishes. It's a flour made from dried masa dough-- a dough made from lime-treated corn.

    When using it to thicken chili,  you'll sprinkle a tablespoon or 2 of it over your finished chili and stir, allowing to simmer for about 10 minutes. The masa harina will absorb some of the extra liquid and make your chili thicker.

    Tools used in making this Award Winning Crockpot Chili:

    • 3-in-1 Ninja Cooking System: I've owned this slow cooker for about six years (when they were first introduced), and I still love it. The stovetop feature allows me to sear and cook meats before allowing them to slow cook (fewer dishes) and there's a bake feature as well.
    • Anolon Nouvelle Copper Non-stick Pans: These non-stick pans are metal utensil safe and last a long time. I've been using Anolon's pans exclusively for the past five years and am still in love with them!

    📖 Recipe

    Bowl of Award Winning Crockpot Chili in a white bowl
    Print Recipe
    4.53 from 85 votes

    Award Winning Crockpot Chili

    If you’re in the market for a good, basic chili recipe, this one is it! This chuck roast chili is studded with big pieces of beef, chiles and black beans and comes together super quickly before being slow-cooked for hours. If you have a chili-cookoff coming up, I think you’re going to want to tuck this award winning crockpot chili in your back pocket for later. 
    Prep Time10 minutes mins
    Cook Time6 hours hrs
    Total Time6 hours hrs 10 minutes mins
    Course: Main Course
    Cuisine: American
    Keyword: beef chuck, seasoning mix, Slow Cooker
    Servings: 6 servings
    Calories: 470kcal
    Author: Heather Cheney

    Ingredients

    • 1 tablespoon canola or olive oil
    • 1 tablespoon ground cumin
    • 1 tablespoon smoked paprika 
    • 2 tablespoons chili powder
    • 3 tablespoons paprika
    • 2 teaspoons onion powder
    • 1-1 ½ pounds boneless beef chuck cut into 1 ½" cubes
    • 2 tablespoons brown sugar
    • 1 teaspoon oregano
    • 1 medium onion medium diced
    • 3 cloves garlic minced
    • 14 ounces diced tomatoes undrained
    • 4 ounces can diced green chilies
    • 1 cup beef broth
    • 1 tablespoon apple cider vinegar
    • 28 ounces black beans 2 cans, rinsed and drained
    • 1 teaspoon kosher salt

    Instructions

    • Heat oil over medium-high heat in a medium-sized skillet. When the oil shimmers, stir paprikas, cumin, chili powder and onion powder into the pan. Cook for 1 minute or until spices are very aromatic and remove from heat.
    • Add beef, sugar, oregano, onion, vinegar, garlic, tomatoes, green chilies, beef broth, beans and salt to the slow cooker. Transfer spices from the skillet into the slow-cooker and stir to combine. 
    • Cover and cook for at least 4 hours on high or until the meat is tender-- 6 hours on low. 

    Nutrition

    Serving: 1serving | Calories: 470kcal | Carbohydrates: 46g | Protein: 36g | Fat: 17g | Saturated Fat: 6g | Cholesterol: 78mg | Sodium: 762mg | Potassium: 1229mg | Fiber: 15g | Sugar: 7g | Vitamin A: 3220IU | Vitamin C: 14.6mg | Calcium: 132mg | Iron: 8.4mg

    Other Soup and Stew Recipes You Might Like

    • Southwest Potato Corn Chowder
    • Keto Chicken Soup
    • Crockpot Tortilla Soup
    • Slow Cooker Tortellini Soup
    • Thai Ramen
    • Instant Pot Lentil Soup
    • Chicken Salsa Chili
    • BBQ Chicken Chili
    • Instant Pot Chicken Dumpling Soup

    Baked Greek Turkey Meatballs + Lemon Rice Skillet

    By Heather LAST UPDATED April 4, 2018 · FIRST PUBLISHED February 21, 2018, 1 Comment

    This easy skillet dinner of greek turkey meatballs and lemon rice is jam-packed with flavor and can be on your table in about 45 minutes!Baked Greek Turkey Meatballs in cast iron skillet

    Greek Turkey Meatballs + Lemon Rice

    If you haven't figured it out yet, one pan dinners are totally my thing. Unnecessarily dirty dishes make my heart hurt, and if I can stuff it into one pan, you better believe I'm going to do it!

    This meatball rice technique can be used for lots of different flavor profiles-- think Italian meatballs in tomato-dotted garlic rice topped with parmesan cheese, or chicken and caramelized onion meatballs immersed in sweet pepper rice-- but today we're going greek.

    I took my greek turkey burger recipe and transformed it into skillet meatballs cooked alongside fragrant lemon rice. To finish, I topped it with crumbled feta cheese, fresh tomato, and fresh parsley. It's a serious explosion of flavor.

    Baked Greek Turkey Meatballs in cast iron skillet

    Cooking Greek Meatballs

    Traditional greek meatballs are called Keftedes and are made with beef, red onion, mint, and oregano. This recipe is a little non-traditional as far as "greek meatballs" go. My greek turkey meatballs use turkey to keep them lean and include spices like cumin, cardamom, and dill. I also use a panade to keep the meatball tender and super moist.

    What is a Panade?

    A panade is a paste made from bread and milk that's often used to keep meatloaf and meatballs moist and help them keep their shape. There's a lot of science that goes into why a panade works the way it does, but here are the basics:

    • When ground, meat forms a tangled web of proteins that kind of glue themselves together. When cooked, this "web" shrinks, squeezing out moisture, making meatballs, burgers, and meatloaf dry and tough.
    • The liquid of a panade (typically milk) adds moisture to the ground meat to replace what's lost.
    •  The molecules of the starch (typically bread) get in the way of the meat proteins and prevent them from forming too strong of a "web, making the meat more tender.

    Baked Greek Turkey Meatballs in cast iron skillet

    Making the Lemon Rice

    Paired with the greek turkey meatballs, this lemon rice is phenomenal. There's not much to it, just some chicken broth, garlic, salt and lemon juice but the flavor is bright! The best rice to use for this is Basmati, but long grain rice works well, too.

    One key to getting great flavor out of rice is to toast it first with aromatics. In this recipe, we're toasting it in olive oil to bring out the nuttiness of the grain and then adding garlic to get that flavor going strong before the chicken broth even hits it.

    Want more easy skillet meal recipes?

    • Chicken Black Bean Enchilada Skillet
    • One Pan Smothered Chicken Skillet
    • Oven Roasted Potato and Sausage Skillet

    Tools Used in making this Greek Turkey Meatball + Lemon Rice Recipe

    • 10" Lodge Cast Iron Skillet: Cast Iron Skillets are your BEST friend and are totally underrated. Cast iron retains heat really well and allows you to get that irresistible sear on steaks and other meats you can usually only get at a restaurant. Pair this with the fact that they are CHEAP it's a no-brainer.
    • Better Than Boullion: I use a lot of chicken/beef/vegetable broth in my recipes because it adds such nice flavor, but I don’t love keeping cans or cartons of it in my pantry. For this reason (and more) I use this broth base anytime I call for broth in my recipes. It only takes one teaspoon of base to make 1 cup of flavorful broth and can be stored for quite a while in the refrigerator.

    📖 Recipe

    Baked Greek Turkey Meatballs in cast iron skillet
    Print Recipe
    5 from 4 votes

    Greek Turkey Meatballs + Lemon Rice Skillet

    This easy skillet dinner of baked greek turkey meatballs and lemon rice is jam-packed with flavor and can be on your table in about 45 minutes!
    Prep Time10 minutes mins
    Cook Time30 minutes mins
    Total Time40 minutes mins
    Course: Main Course
    Cuisine: Mediterranean
    Keyword: meatballs, one pan, rice pilaf
    Servings: 6 servings
    Calories: 396kcal
    Author: Heather Cheney

    Ingredients

    • 1 ¼ pounds ground turkey
    • 1 teaspoon dried oregano
    • 1 /4 teaspoon ground cardamom
    • 1 teaspoon ground cumin
    • 1 teaspoon kosher salt
    • 2 teaspoons dried dill weed
    • 1 teaspoon smoked paprika
    • ¾ cup sweet onion finely chopped
    • ¼ cup flat leaf parsley chopped
    • 1 egg
    • 2 pita bread halves soaked in milk until soft
    • 1 tablespoon olive oil
    • 1 ½ cups long grain or basmati rice
    • 2 cloves garlic finely minced
    • ¾ teaspoon kosher salt
    • 3 ¼ cups chicken broth
    • 2 tablespoon fresh lemon juice
    • ¼ cup feta cheese crumbled
    • ½ cup fresh tomato diced
    • ¼ cup flat leaf parsley chopped

    Instructions

    • Combine turkey, oregano, cardamom, cumin, salt, dill, paprika, onion, parsley, and egg in a bowl. Take pita bread out of milk and gently squeeze a bit of the excess milk from it. Place in the bowl. 
    • Stir ingredients together until it forms a cohesive mixture, but don't over mix as it can make the meatballs tough. 
    • Use a cookie scoop to portion the meatballs and roll each meatball into an even ball. 
    • Heat olive oil in a large 12-inch nonstick skillet over medium heat until it shimmers and is hot. Add the meatballs in a single layer and brown on each side. There's no need to cook them through here as they will finish cooing in the rice.
    • Gently scoop the meatballs out of the skillet and onto a paper towel-lined plate to drain and return the skillet to medium heat (wiping out any excess grease – leaving just a tiny bit for the rice).
    • Add the rice to the skillet and cook for 2-3 minutes, stirring constantly, until the edges of the rice start to lightly brown. Add the garlic and salt and cook for another minute. Stir in the broth and lemon juice and bring the mixture to a simmer.
    • Gently nestle the meatballs back into the rice mixture and cover the skillet. Reduce the heat to low and cook until the rice is tender and the meatballs are cooked through, about 18-20 minutes.
    • Remove the skillet from the heat and let it sit, covered, for 5 or so minutes. Uncover and sprinkle with feta cheese, chopped tomato and additional fresh parsley, if desired. Serve immediately.

    Nutrition

    Serving: 1serving | Calories: 396kcal | Carbohydrates: 51g | Protein: 30g | Fat: 7g | Saturated Fat: 2g | Cholesterol: 84mg | Sodium: 1381mg | Potassium: 571mg | Fiber: 1g | Sugar: 1g | Vitamin A: 800IU | Vitamin C: 20.6mg | Calcium: 96mg | Iron: 2.6mg

    Zesty Queso Keto Chicken Soup

    By Heather LAST UPDATED March 22, 2021 · FIRST PUBLISHED February 12, 2018, 17 Comments

    Whether you eat keto or not, this zesty queso keto chicken soup is my new favorite for chilly nights. You can make it in the slow cooker or instant pot and it's creamy, slightly spicy and full of flavor. Instant Pot Chicken Queso Soup In bowl

    While I'm ready for winter to be over, I'm never ready for soup season to end. This queso chicken soup is creamy and smooth and packs a big punch of flavor from the use of salsa verde in the soup base.

    You can make this as low carb or high carb as you'd like, too! This chicken queso soup would be great with the addition of some black beans and frozen corn. Serving it up with some tortilla chips is also delicious!

    I'm very non-committedly trying to eat keto for a while (with lots of help from these delicious little peanut butter balls) so I keep the recipe as is and eat with a good serving of diced avocado and Monterrey jack cheese. I'm pretty sure I could live off this soup... or this creamy chicken one when I'm not eating keto. I clearly have a thing for creamy soups.

    Instant Pot Chicken Queso Soup

    Making Chicken Keto Soup in the Instant Pot

    This chicken queso soup can be made quickly in the Instant pot and it's definitely my favorite way to make it! Directions for doing so are in the recipe card below.

    Making Queso Chicken Soup in the Slow Cooker

    When I think ahead this recipe is great in the slow cooker, too. Just throw all the ingredients into the slow cooker and cook on low for at least 6 hours or until the chicken shreds easily. This recipe is pretty similar to my green salsa chicken soup with hominy, so if you want a soup that is a little less creamy and lighter you should try it!

    Instant Pot chicken Queso soup

    Recipe Tips for this Queso Keto Chicken Soup

    • Adding ingredients: like I mentioned above, if you don't need this soup to be low-carb, this soup is great with the addition of black beans and frozen corn. Just add them in with the rest of the soup ingredients and cook as directed.
    • The recipe calls for salsa verde or green salsa. Note that prepared salsa verde can vary greatly in heat. I've found that Herdez brand has a medium heat that my family can handle. La Costena is another brand I've used and liked.

    Can I use Neufchatel Cheese instead of full-fat Cream Cheese?

    Neufchatel cheese is very similar to cream cheese but is a bit moister and has a lower fat content (⅓ fat) of regular cream cheese. I haven't tried using it in this recipe specifically, but have in other soup recipes with success. It may be a bit harder to incorporate into the soup, so you may have to put a little bit of muscle into it, but it should melt fully and leave you with a soup that is lower in fat. I do not advise using fat-free cream cheese, however.

    Other Chicken Recipes You Might Like

    • Chicken lo mein recipe
    • Pesto Parmesan Chicken
    • Easy Chicken Cacciatore
    • Smothered Chicken Breast
    • Honey Dijon Chicken Thighs
    • garlic chicken thighs
    • Ranch Chicken Marinade
    • Simple Grilled Chicken Recipe
    • Barbecue Chicken
    • Wingers Sticky Fingers
    • Sweet Chili Sauce Chicken
    • Oven Fried Chicken Breast
    • Chicken Ricotta
    • Chicken Curry with Coconut Milk

    Other Soup and Stew Recipes You Might Like

    • Southwest Potato Corn Chowder
    • Award Winning Best Crockpot chili recipe
    • Crockpot Tortilla Soup
    • Slow Cooker Tortellini Soup
    • Thai Ramen
    • Instant Pot Lentil Soup
    • Chicken Salsa Chili
    • BBQ Chicken Chili
    • Instant Pot Chicken Dumpling Soup

    📖 Recipe

    Instant Pot chicken Queso soup
    Print Recipe
    4.80 from 69 votes

    Zesty Queso Keto Chicken Soup

    Whether you eat keto or not, this zesty queso keto chicken soup is my new favorite for chilly nights. You can make it in the slow cooker or instant pot and it's creamy, slightly spicy and full of flavor. 
    Prep Time5 minutes mins
    Cook Time30 minutes mins
    Total Time35 minutes mins
    Course: Soup
    Cuisine: Mexican
    Keyword: cream cheese broth, keto, low carb soup
    Servings: 6 servings
    Calories: 237kcal
    Author: Heather Cheney

    Ingredients

    • 2 large boneless skinless chicken breast halves
    • 2 tablespoons taco seasoning
    • 28 ounces petite diced tomatoes not drained
    • ¼ teaspoon kosher salt
    • 2 cups chicken broth
    • 1 cup salsa verde or green salsa
    • 8 ounces cream cheese softened
    • avocado and monterrey jack cheese for topping

    Instructions

    Instant Pot:

    • Place chicken, taco seasoning, tomatoes with juices, salt, chicken broth, and green salsa in Instant Pot. Set to manual mode and cook for 10 minutes at high pressure. Allow pressure to release naturally (about 15 minutes), remove and shred the chicken. Set aside. 
    • Stir softened cream cheese into the soup in the pot and whisk until fully melted into the soup. Return chicken to the soup and serve with diced avocado and monterrey jack cheese.

    Slow Cooker:

    • Place all ingredients in the slow cooker and cook on low for 6 hours or until the chicken is tender and shreds easily. Whisk cream cheese into the broth fully if needed after cooking time is up. 

    Nutrition

    Serving: 1serving | Calories: 237kcal

    Sweet Ham and Swiss Sliders

    By Heather LAST UPDATED July 22, 2019 · FIRST PUBLISHED February 6, 2018, 18 Comments

    These Ham and Swiss Sliders are a perfect party food and can be baked whenever you're ready to eat, so they're always hot and melty for your guests! Sweet Ham and Swiss Sliders are a perfect party food and can be baked whenever you're ready to eat, so they're always hot and melty for your guests!

    Y'all these are INSANE! I originally posted this Sweet Ham and Swiss Sliders recipe about 5 years ago and in that time it has become one of the most-visited recipes on HLF.

    One of the things I love most about these Ham and Swiss Sliders is that they are very kid friendly while being just interesting enough for adults to get excited about too. I mean, who doesn't love a sticky-sweet and savory butter sauce poured over their ham and cheese slider, right?

    Sweet Ham and Swiss Sliders are a perfect party food and can be baked whenever you're ready to eat, so they're always hot and melty for your guests!

    Should I use Hawaiian Rolls for Ham and Swiss Sliders?

    Most recipes for these sliders use sweet Hawaiian Rolls, but I'm a rebel and like to use plain ol' boring white dinner rolls. I do this for a few reasons:

    • They're cheaper. 🙂
    • Hawaiian Rolls can be TOO sweet sometimes.
    • Using plain rolls means I can add a little bit of brown sugar to the glaze which makes the ham and cheese sliders just a little bit caramelized and sticky and I love that!

    Pin This Recipe To Your Sandwich Board

    Sweet Ham and Swiss Sliders are a perfect party food and can be baked whenever you're ready to eat, so they're always hot and melty for your guests!

    How Far Ahead Can I Make These Ham and Swiss Sliders?

    I love this ham and cheese sliders recipe for parties because you can assemble them through the step where you pour on the glaze, cover with foil and put in the fridge until you're ready to bake-- up to 24 hours in advance!

    Pin This Recipe To Your Sandwich Board

    Sweet Ham and Swiss Sliders are a perfect party food and can be baked whenever you're ready to eat, so they're always hot and melty for your guests!

    Other Party and Appetizer Recipes You Might Really Like

    • Garden Vegetable Cold Appetizer Pizza
    • Shredded Beef and Blue Cheese Sliders
    • Sausage and Cheese Appetizer Bites
    • Baked Cheese Ball Dip
    • White Queso Blanco Dip
    • Coconut Lime Cream Cheese Fruit Dip
    • Copycat Wingers Sticky Fingers Recipe

    Tools Used For Ham and Swiss Sliders:

    • Silpat Silicone Baking Mats-- I use these silicone baking mats to line my baking sheet anytime I bake. Practically nothing sticks to them and I feel like my baked goods bake more evenly on them as well.
    • Nordic Ware ½ Sheet Pans-- I LOVE these sheet pans! They last a long time, are commercial-grade and bake evenly!

    Pin This Recipe To Your Sandwich Board

    📖 Recipe

    Sweet Ham and Swiss Sliders are a perfect party food and can be baked whenever you're ready to eat, so they're always hot and melty for your gue
    Print Recipe
    4.67 from 15 votes

    Sweet Ham and Swiss Sliders

    Sweet Ham and Swiss Sliders are a perfect party food and can be baked whenever you're ready to eat, so they're always hot and melty for your guests!
    Prep Time10 minutes mins
    Cook Time20 minutes mins
    Total Time30 minutes mins
    Course: Main Course
    Cuisine: American
    Keyword: hawaiian rolls, make ahead, sweet butter sauce
    Servings: 12 sliders
    Calories: 331kcal
    Author: Heather Cheney

    Ingredients

    • 12 White Dinner Rolls cut in half
    • 24 slices Honey Ham
    • 8 slices Swiss Cheese cut in half
    • ¼ cup Mayonnaise
    • 1 ½ Tablespoon Dijon Mustard
    • 8 Tablespoons butter melted
    • 1 teaspoon onion powder
    • ½ teaspoon Worcestershire Sauce
    • 1 Tablespoon poppy seeds
    • ¼ cup brown sugar

    Instructions

    • On a rimmed baking sheet place bottom half of dinner rolls and top with 2 folded slices of ham and 1 slice of swiss cheese. Spread about 1 teaspoon of mayonnaise on each top-half of roll and place on top of ham and cheese. You want the rolls to be snug together, kissing just a bit so the sauce can soak up into all of the nooks and crannies.
    • In a small bowl combine the mustard, melted butter, onion powder, Worcestershire sauce, poppy seeds, and brown sugar. Mix until combined and evenly pour over the assembled rolls. Cover with foil and refrigerate until ready to bake.
    • Preheat oven to 400 degrees.Bake covered with foil for 10 minutes, remove the foil and bake for an additional 5-10 minutes or until the tops are browned, and cheese is good and melted.

    Nutrition

    Serving: 1slider | Calories: 331kcal | Carbohydrates: 6g | Protein: 17g | Fat: 26g | Saturated Fat: 12g | Cholesterol: 73mg | Sodium: 827mg | Potassium: 186mg | Sugar: 4g | Vitamin A: 390IU | Calcium: 171mg | Iron: 0.7mg

    Make Ahead Buttermilk Pancake Mix

    By Heather LAST UPDATED March 22, 2021 · FIRST PUBLISHED February 3, 2018, 2 Comments

    Itching for some fluffy and moist buttermilk pancakes but would just rather grab a box of premade pancake mix because it's easier? I'm going to show you how to make pancake mix from scratch! Homemade pancake mix is super easy to make, and you can keep it tucked away in your fridge until you're ready for some of the most scrumptious homemade buttermilk pancakes you'll ever eat!Homemade Pancake Mix in a bowl

    I'm bad at making breakfast--mostly because waking up is hard. Like, really hard.  So, breakfasts here are usually quick and easy and require minimal clean-up. Heaven knows I'm not going to whip out four bowls (1 for the dry, 1 for the wet, 1 for the egg whites, 1 for... something else) to make a single batch of pancakes.

    Nope. Nope. Nope.

    Now,  If we're talking about making breakfast FOR dinner that's a completely different story because, well, I'm awake and not grouchy and generally motivated. Making pancakes from scratch at 5:30 pm is more my speed.

    But for breakfast (in the morning) I like it quick, I like it mess-free and I like mixes.

    Yep, you heard me; I like mixes!

    Be Sure to Sign Up For My Email! New Recipes Delivered Straight to You!

    Using a mix means I don't have to think-- or at least not very hard and most of the work is done for me! So, in an effort to help my pancake-loving-soul be happy in the mornings, I turned my favorite buttermilk pancake recipe into a mix. And, it's ridiculously. Good.

    Homemade Pancake Mix made with this Powdered Buttermilk blend

    How to make pancake mix from scratch

    I love buttermilk pancakes but I rarely have buttermilk on hand, so I used dry buttermilk powder in the mix instead. In addition to the buttermilk powder, you'll add some leaveners, salt, sugar, and all-purpose flour to make your homemade pancake mix.

    How do I Make Homemade Buttermilk Pancakes from the mix?

    When you're ready for some pancakes all you need is your homemade pancake mix, a bit of milk, water, two eggs, and some melted butter. I tried to figure the recipe out without using butter to make it easier and the resulting pancakes were good but weren't the best. The butter makes all the difference because it's butter and butter is magic.

    Homemade Pancake mix stirred with butter, eggs and milk for perfect pancakes from scratch

    Can You Store Homemade Pancake Mix?

    Yes! The one drawback to using powdered buttermilk is that the homemade pancake mix needs to be stored in the fridge or freezer. But, the plus side to this is that it will last a LONG time. We're talking up to a year in the freezer and 6-8 months in the fridge when stored in an airtight container.

    Pancakes from scratch made with homemade pancake mix

    The finished pancakes are fluffy and light and have all sorts of that rich buttery-ness that I just love.

    Homemade buttermilk pancakes on a plate made from homemade pancake mix

    Want More Easy Breakfast Recipes?

    • Melt In Your Mouth Waffles
    • Super Fluffy Whole Wheat Pancakes
    • Sausage, Egg and Potato Breakfast Bake

    Pin This Recipe For Later

    So, go make some homemade pancake mix, put it in the fridge and stop thinking so hard in the morning. You can do this!

    I'm serious; you want to sign up for my Email! You'll never miss a dang recipe!

    📖 Recipe

    Itching for some fluffy and moist buttermilk pancakes but would just rather grab a box of premade pancake mix because it's easier? This Make ahead buttermilk pancake mix recipe is just what you need! Make up a batch and keep tucked away in your fridge until you're ready for some of the most scrumptious pancakes you'll ever eat.
    Print Recipe
    4.62 from 18 votes

    Make Ahead Buttermilk Pancake Mix

     Itching for some fluffy and moist buttermilk pancakes but would just rather grab a box of premade pancake mix because it’s easier? This make ahead buttermilk pancake mix recipe is just what you need! Make up a batch and keep it tucked away in your fridge until you’re ready for some of the most scrumptious pancakes you’ll ever eat. 
    Prep Time10 minutes mins
    Cook Time10 minutes mins
    Total Time20 minutes mins
    Course: Breakfast
    Cuisine: American
    Keyword: buttermilk powder, homemade, pancake mix
    Servings: 3 batches of 20, 4" pancakes
    Calories: 1570kcal
    Author: Heather Cheney

    Ingredients

    • 1.5 cups dry buttermilk powder *See Notes*
    • 2 tablespoons baking soda
    • 2 tablespoons baking powder
    • 2 tablespoons kosher salt
    • ¾ cups sugar
    • 7 ½ cups All Purpose Flour

    Instructions

    • Whisk all ingredients together thoroughly and place in an airtight container. Store in the fridge until ready to use.

    TO MAKE PANCAKES (about 20, 4" pancakes):

    • Measure 3 cups of dry mix into a large bowl. Add ½ C milk, 2 eggs, 2 C warm water, and ½ C melted butter (melted and cooled for a few minutes before adding). Whisk until just combined and fairly lumpy <-- lumps will disappear in the finished pancakes. Heat a non-stick griddle to medium and use a ¼ C measuring cup to portion the batter onto the pan. Cook until the bubbles around the edges pop, flip and continue to cook an additional minute or until done to your liking.

    Notes

    Dry powdered buttermilk can be found in the baking aisle at most grocery stores. I like to use it in this mix because I rarely have fresh buttermilk on hand when I have a craving for pancakes. Once opened the dry buttermilk does need to be refrigerated however, causing this mix to need to be stored in the fridge until ready to use.
    I understand that not everyone has enough room in their fridge to store 3 batches worth of pancake mix, so you can omit the powdered buttermilk in this mix if you'd like to store it in the pantry. When you're ready to make pancakes just omit the water called for and add 2 C of fresh buttermilk instead.

    Nutrition

    Serving: 1batch of mix | Calories: 1570kcal | Carbohydrates: 321g | Protein: 52g | Fat: 6g | Saturated Fat: 2g | Cholesterol: 41mg | Sodium: 7163mg | Potassium: 2097mg | Fiber: 8g | Sugar: 80g | Vitamin A: 105IU | Vitamin C: 3.4mg | Calcium: 1104mg | Iron: 15.3mg

    Pin This Recipe For Later


    Candied Caramel Cheetos

    By Heather LAST UPDATED November 5, 2019 · FIRST PUBLISHED February 2, 2018, 5 Comments

    Don't knock these Candied Caramel Cheetos until you try them! They are the ultimate sweet and salty treat and leave you wanting so. many. more.  Candied Caramel Cheetos

    I'm on a bit of a snack-making kick lately and these Candied Caramel Cheetos have burrowed their way into my little heart in a big way. They kind of taste like a caramel + cheese popcorn hybrid with the crunch of a Cheeto.

    I realize that these are basically the epitome of junk food but ya' only live once! I'm a firm believer of all things in moderation and making a batch of these every Monday is totally moderation, right? Right. Know your limits, folks. 🙂

    If you can make caramel corn, and heck, even if you haven't you can make these!

    How to Make Candied Caramel Cheetos

    [brid autoplay="true" video="484766" player="19763" title="Candied Cheetos" duration="45" description="Candied Cheetos Recipe" uploaddate="2019-10-30 15:19:50" thumbnailurl="https://cdn.brid.tv/live/partners/15101/thumb/484766_t_1572449088.png"]


     Candied Caramel Cheetos or Coyote Droppings in a white bowl.

    Can I use crunchy Cheetos to make caramel Cheetos?

    People that know me (okay, maybe just my hubby and high school friends) know that I am a die hard Cheetos Puffs fan. If a bag of crunchy Cheetos is offered I'll probably take it, but puffs are definitely the way to go in my book.

    That said you can definitely make this recipe using crunchy Cheetos if you'd like. In fact, caramel covered regular Cheetos are usually called "Coyote Droppings" for some incredibly strange reason.

    Why Do I need to bake the Cheetos after putting the caramel sauce on them?

    Doing this will allow the caramel sauce to further cook and become hard and crunchy. If you were to skip the baking step you'd likely be left with Cheetos that were soggy and chewy.

    Candied Caramel Cheetos in a white bowl.

    If you're still on the fence about these, I don't blame you but I do hope you'll at least explore the idea of trying them. I don't want you missing out on your new favorite junk food. That would be sad.

    Want more fun sweet and salty snack recipes?

    • Sweet and Salty Popcorn Sundaes with Butterscotch Sauce and Hot Fudge
    • Court-side Crunch 7 Layer Bars

    📖 Recipe

    Candied Caramel Cheetos In white bowl
    Print Recipe
    4.50 from 62 votes

    Candied Cheetos

    Don't knock these Candied Caramel Cheetos until you try them! They are the ultimate sweet and salty treat and leave you wanting so. many. more. 
    Prep Time10 minutes mins
    Cook Time1 hour hr
    Total Time1 hour hr 10 minutes mins
    Course: Snack
    Cuisine: American
    Keyword: cheetos recipe, crunchy caramel corn, sweet and salty
    Servings: 8 servings
    Calories: 162kcal
    Author: Heather Cheney

    Ingredients

    • 1 bag Cheetos Puffs 8.5 ounce bag
    • ½ cup light corn syrup
    • ½ cup brown sugar
    • 4 tablespoons butter

    Instructions

    • Preheat oven to 250 degrees.
    • Pour Cheetos into a large mixing bowl.
    • Heat corn syrup, brown sugar, and butter over medium heat. Bring to a boil stirring frequently and allow to boil for one minute.
    • Pour caramel mixture over the Cheetos and stir until most pieces are well coated. Spread Cheetos evenly out on a lined baking sheet and place in oven for 15 minutes. Stir and continue to bake for an additional 15 minutes and stir, repeating this process 2 more times for a total of 60 minutes in the oven. When done, the caramel will be hard and Cheetos will be crunchy and not at all chewy.
    • Remove from oven, cool and break into pieces if needed.

    Notes

    **Nutrition Facts do not include Cheetos as they are not part of our database. Please add that when calculating nutrition** Though, if you're eating candied Cheetos, I'm pretty sure you don't care. 🙂 

    Nutrition

    Serving: 1serving | Calories: 162kcal | Carbohydrates: 29g | Fat: 5g | Saturated Fat: 3g | Cholesterol: 15mg | Sodium: 67mg | Potassium: 18mg | Sugar: 29g | Vitamin A: 175IU | Calcium: 16mg | Iron: 0.1mg

    Sweet and Salty Popcorn Sundaes with Butterscotch Sauce and Hot Fudge

    By Heather LAST UPDATED March 22, 2021 · FIRST PUBLISHED February 1, 2018, 2 Comments

    You may be a skeptic, but cheese popcorn is MEANT for ice cream popcorn sundaes! Especially when paired with the best homemade hot fudge and homemade butterscotch sauce! It's sweet n' salty goodness, friends! Ice cream sundae with homemade hot fudge sauce, homemade butterscotch sauce and chicago mix popcorn

    First things first. Let's just jump right in and talk about putting popcorn on your ice cream. Butterscotch sauce and hot fudge is great, but have you ever tried popcorn? If not, it's definitely something you need to consider. Up until a few weeks ago, I had only indulged in one caramel popcorn sundae a few years ago, and I'm not really sure why I haven't had one since. I'm clearly doing things very, very wrong with my life.

    This is a sponsored conversation on behalf of G.H. Cretors Popped Corn. Of course, all thoughts and opinions are my own. 

    It wasn't until I started talking with G.H. Cretors about making a recipe that all the fond memories of caramel popcorn sundaes came flooding back to me and I knew, I KNEW I had to make a sundae with not only caramel popcorn but with cheese popcorn too.Ice cream sundae with homemade hot fudge sauce, homemade butterscotch sauce and Chicago mix popcorn

    If you fall into the "Costco Mom" category (like me), I'm willing to bet allll the dirty clothes on my laundry room floor that you've left that store more than once with a bag of G.H. Cretors "The Mix" popcorn in your over-filled cart.

    Am I right?

    If so, you definitely need to make this because you know how good the popcorn is! The caramel and cheese combo makes it perfectly sweet and salty and still gives the sweet, satisfying crunch that just caramel popcorn gives to the sundae.

    Ice cream sundae with homemade hot fudge sauce, homemade butterscotch sauce and a bowl of Chicago mix popcorn

    The other reason you need to make this sundae? The homemade hot fudge and butterscotch sauce!

    Sure, you could just use chocolate syrup and jarred butterscotch, but that would be bummer.The recipes for both of the sauces are below, and both are phenomenal and EASY! Like, put all the ingredients in the pan and stir, easy.

    [brid autoplay="true" video="484753" player="19763" title="Sweet and Salty Popcorn Sundaes" duration="60" description="Popcorn Sundae Recipe" uploaddate="2019-10-30 15:19:48" thumbnailurl="https://cdn.jwplayer.com/v2/media/5v4NHb90/poster.jpg?width=720"]
    Ice cream sundae with homemade hot fudge sauce and butterscotch sauce

    What's the Difference Between Butterscotch Sauce and Caramel Sauce?

    Butterscotch is made with brown sugar while caramel is made with granulated sugar. The flavor is a little stronger from the addition of molasses but is still pretty similar to caramel. Many people think its called butterscotch because of the addition of scotch, but that's not true.

    How to Store Homemade Butterscotch Sauce and Hot Fudge

    Both sauces can be poured into an airtight container like a mason jar and refrigerated for up to 3 months due to the high sugar content. I would not try freezing either of them.

    Homemade hot fudge sauce and homemade butterscotch sauce on vanilla ice cream

    The popcorn sundaes themselves are pretty straight-forward-- vanilla ice cream, hot fudge, butterscotch sauce and POPCORN!!

    Ice cream sundae with homemade hot fudge sauce, homemade butterscotch sauce and chicago mix popcorn

    You're definitely going to want to save some of the popcorn for movie snacking with a big blanket, as well.

    Movies AND ice cream are better with popcorn, IMO.

    G.H. Cretors Chicago Mix Popcorn in bowl

    Pin this for Later

    Want More Easy Frozen Dessert Recipes?

    • Frozen Hot Chocolate
    • Four Ingredient Peaches and Cream Freeze

    This is a sponsored conversation on behalf of G.H. Cretors Popped Corn. Of course, all thoughts and opinions are my own. 

    📖 Recipe

    You may be a skeptic, but cheese popcorn is MEANT for ice cream sundaes! Especially when paired with the best homemade hot fudge and homemade caramel sauce! It's sweet n' salty goodness, friends!
    Print Recipe
    5 from 2 votes

    Homemade Butterscotch Sauce and Hot Fudge Sauce

    You may be a skeptic, but cheese popcorn is MEANT for ice cream popcorn sundaes! Especially when paired with the best homemade hot fudge and homemade butterscotch sauce! It’s sweet n’ salty goodness, friends!
    Prep Time5 minutes mins
    Cook Time5 minutes mins
    Total Time10 minutes mins
    Course: Dessert
    Cuisine: American
    Keyword: banana split, ice cream bar, sundae topping
    Servings: 4 servings
    Calories: 947kcal
    Author: Heather Cheney

    Ingredients

    Butterscotch Sauce:

    • ¼ cup salted butter
    • ½ cup packed dark brown sugar
    • ½ cup heavy cream
    • 1 ½ teaspoon vanilla extract
    • ¼ teaspoon table salt

    Hot Fudge:

    • 2 cups powdered sugar
    • 1 can 12 oz evaporated milk
    • ½ cup salted butter
    • ¾ C semi sweet chocolate chips

    Instructions

    Butterscotch Sauce:

    • 1. Melt butter in a medium-sized saucepan over medium heat. Add the sugar, cream, and salt and whisk until blended. Bring to a gentle boil and cook for about 5 minutes, stirring occasionally. 2.Remove from the heat and add vanilla extract, stirring well. Allow to cool. The sauce will thicken as it cools.

    Hot Fudge:

    • 1.Place all ingredients into a medium-sized sauce pan and heat over medium.
    • 2.Bring to a gentle boil, constantly stirring for 8 minutes.
    • 3.Remove from the heat and allow to cool slightly before serving. Reheat as needed.

    Nutrition

    Serving: 1serving | Calories: 947kcal | Carbohydrates: 105g | Protein: 3g | Fat: 58g | Saturated Fat: 36g | Cholesterol: 134mg | Sodium: 472mg | Potassium: 250mg | Fiber: 2g | Sugar: 98g | Vitamin A: 1520IU | Calcium: 73mg | Iron: 2.3mg

    How to Cook Perfect Brown Rice

    By Heather LAST UPDATED April 4, 2018 · FIRST PUBLISHED February 1, 2018, 5 Comments

    Tired of mushy, gummy, or not-quite-cooked-enough brown rice? This is my foolproof method to cook perfect brown rice that's fluffy every time! Below I'll show you how to cook brown rice on the stove-- rice cookers aren't the only way to success! Bowl of fluffy perfect brown rice with chopsticks

    Perfect Brown Rice

    I'm a big fan of brown rice but it wasn't always that way. There was a long time that I was convinced that brown rice had two ways of being served-- chewy and hard or complete mush. I don't know why I had never had properly cooked brown rice before, but I just hadn't.

    It wasn't until I learned to make it this way that I actually started liking it. It's been years since I figured this out and I honestly can't remember where I read about this method, but it truly is the best way to cook brown rice.

    And now, I rarely make white rice anymore! My kids don't ask for it and I actually prefer the hearty, nutty taste of brown rice compared to the white.

    Also, this perfect brown rice method doesn't take 5 bazillion years to cook! Just 30 minutes, which is quite an improvement from the hour+ I was cooking it on the stovetop before.

    Are you ready for this? It's so stinkin' simple.

    How To Cook Brown Rice on the Stove

    Boil some water in a big pot just like you would for pasta.

    A pot cooking perfect brown rice on the stove top

    Pour your desired amount of rice into the boiling water, just like you would pasta.

    Pouring brown rice into a pot of boiling water to cook

    Let it boil, just like you would pasta, for 30 minutes. Try a piece and see if it's tender enough for you. If not, just keep boiling.

    Perfect brown rice on a spatula above a pot

    If it is cooked how you like, pour the rice and water into a colander and drain off the water. Then, quickly pour the rice back into the pot and cover it. You'll let it "steam" like this for 5 minutes.

    After it's had a chance to steam, just fluff it up with a fork and you're ready to eat!

    Fluffy and Perfect brown rice cooked in a pot on the stove

    Pretty simple huh? If you try this perfect brown rice method, I'd love to hear what you think! It's definitely made getting our whole grains into our meals a whole lot easier!

    Want More Cooking Tutorials?

    • The Best Way To Cut A Watermelon
    • How to Roast Garlic
    • Cooking School: How to Grill the Perfect Steak

    📖 Recipe

    How To Cook Perfect Brown Rice
    Print Recipe
    4.84 from 6 votes

    How to Cook Perfect Brown Rice

    Tired of mushy, gummy, or not-quite-cooked-enough brown rice? This is my foolproof way to get perfectly cooked, fluffy brown rice every time!
    Prep Time5 minutes mins
    Cook Time30 minutes mins
    Total Time35 minutes mins
    Course: Side Dish
    Cuisine: American
    Keyword: how to cook, not mushy, steamed rice
    Servings: 4 cups cooked rice
    Calories: 343kcal
    Author: Heather Cheney

    Ingredients

    • 2 cups Brown Rice
    • 3 Quarts Water
    • 1 teaspoon salt

    Instructions

    • Bring water to a boil in large pot. Add salt bring back to a boil and pour in rice. Let cook at a full boil (just like you do pasta) for 30 minutes.
    • Test a piece of rice and if it's cooked to your liking, remove from heat and pour rice into a colander to drain off the water.
    • Immediately pour rice back into the pot and cover with a tight fitting lid. Allow rice to steam off the heat for 5 minutes and fluff with a fork before serving.

    Nutrition

    Serving: 1serving | Calories: 343kcal | Carbohydrates: 72g | Protein: 7g | Fat: 2g | Sodium: 620mg | Potassium: 254mg | Fiber: 3g | Calcium: 53mg | Iron: 1.7mg

    3.4.3177
    • « Previous Page
    • 1
    • 2
    • 3
    • 4
    • 5
    • …
    • 13
    • Next Page »
    Headshot of Heather in an apron

    Hi, I'm Heather! Want to become a rockstar cook? I’m a former chef, caterer, and culinary arts school graduate that just wants to help you make some killer food! I truly believe that with a little know-how anyone can totally rock their kitchen. Stick around for ultimate recipes of your favorite foods, cooking tips, guides, and more!

    More about me →

    Popular Recipes

    • BBQ chicken cut on a cutting board with a bottle of bbq sauce
      The Best Super Moist Oven Baked BBQ Chicken
    • One Pan Sour Cream Chicken Enchilada Skillet
      One Pan Sour Cream Chicken Enchilada Skillet
    • Hawaiian Shoyu Chicken-- so flavorful you'll forget how easy it is to make! Filled with flavors of ginger, garlic and just a touch of red pepper.
      Hawaiian Shoyu Chicken
    • Sloppy Joe on a paper bag
      The Best Sloppy Joe Sauce
    • Coffee Cake In A Mug-- the perfect remedy for a sugar craving when you don't want to spend a lot of time or heat up the oven. #coffee #cake #microwave #mug
      Coffee Cake in a Cup
    • Baked Ricotta Chicken
      Baked Ricotta Chicken
    • Mom's Classic Meatloaf Recipe
    • Beef Teriyaki Stir Fry
    Email opt in image

    Cooking Method

    • Slow Cooker
    • Grilling

    Footer

    ↑ back to top

    About

    • Privacy Policy
    • Disclaimer

    Newsletter

    • Sign Up! for emails and updates

    Contact

    • About
    • Email
    • Work With Me

    As an Amazon Associate I earn from qualifying purchases. This site uses cookies and generates income via ads.

    Copyright © 2022 Heather Likes Food, LLC

    Rate This Recipe

    Your vote:


    A rating is required
    A name is required
    An email is required